Atari Jaguar | Nondestructive 50/60hz Switch Mod
Here is a little mod for the Atari Jaguar that I don’t think is available on the internet at the moment. I was looking to add a switch to one of my Jaguar consoles in order to switch between PAL (50hz) and NTSC (60hz). In order to test Flappy McFur in both modes. The tutorials available online all use an additional switch in order for the mod to work. Also, most of the available tutorials suggest cutting a hole in the beautiful Jaguar Console’s case. In the case of this one tutorial, you can even use a rocker switch, which looks pretty cool I must admit, but I am not comfortable with cutting a hole into my cat.
So, during a conversation with an electrician friend, who has helped me with some other Jag related electronic issues, he pointed out that you just need to short out the point that is used to detect whether or not the console is in PAL or NTSC mode. Obvious right, this is what an external switch does. Then he proceeded to point out that the console already has an “additional” switch that could be used for that purpose, without damaging the console. That is the switch located on the RF module.
A couple of minutes later, we had a Jaguar switching refresh rates like a pro.
Disclaimer
Now, the title of this post isn’t completely telling the truth. You do have to sacrifice one of the RF frequencies (high or low, I can’t remember which one…), but this is a small price to pay, and for most Jaguar owners, not a big deal. Composite or S-Video right? If you still really want to use RF, the option is available, but slightly limited. And before we start, I don’t take responsibility for anything that might happen to your console during or after you apply this modification. With that in mind, I have had this mod for about 2 months now, with no issues on my NTSC jaguar. Lets get started.
50/60hz (PAL/NTSC) Switch Mod
Tools and Supplies
Tools and supplies are simple. Just a soldering iron, some solder, a wire (about 15 to 16 inches long – 38cm to 41cm), and a Jaguar console.
Opening your Console
Here is a quick video that will show you how to do that. Basically for screws and bending up a few tabs.
Soldering
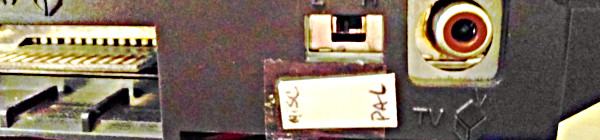
First you will need to open your console, if you aren’t sure how to do this here is great video to show you how to do that. After you get access to the motherboard, you will need to remove the metal cap off of the RF modulator (the silver box near the back left of the console. This is easy enough to pop off using a screw driver or pliers. This will give you access to soldering point 1.
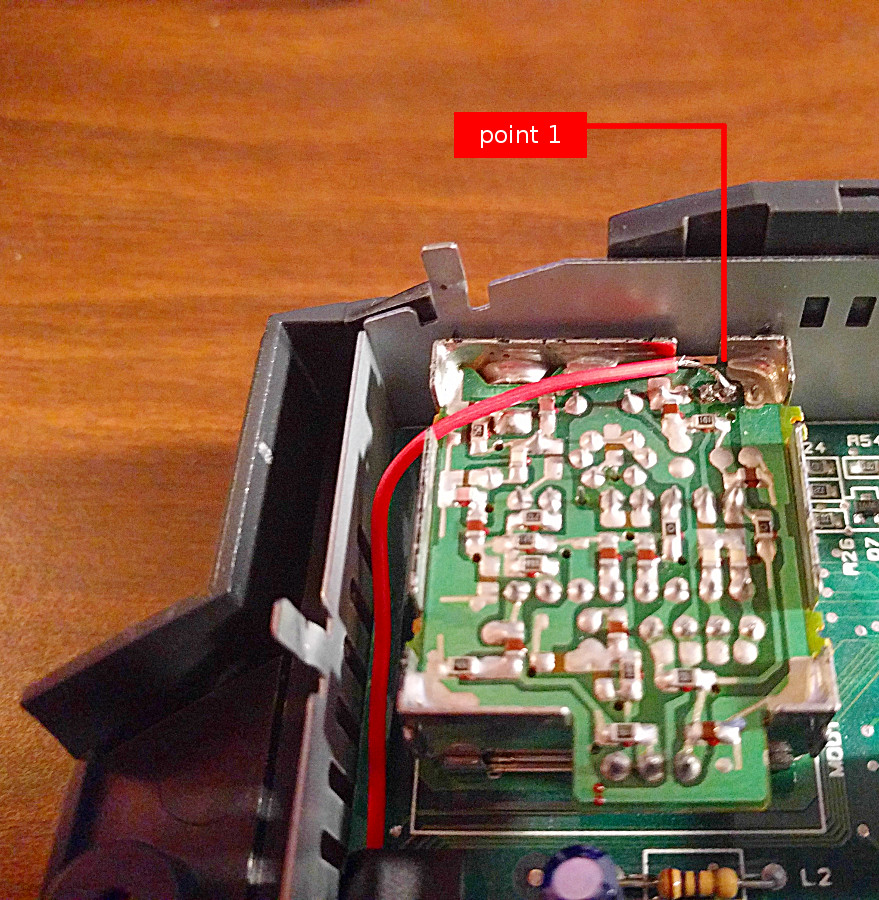
Point 1 is located in the top right corner of the RF modulator box, second from the right side of the box (please refer to the picture for reference). If you aren’t worried about being perfect, you can just add some existing solder to point, attaching it to the existing pin. Or, you can remove the older solder, and then re-soelder the point with the wire attached as well.
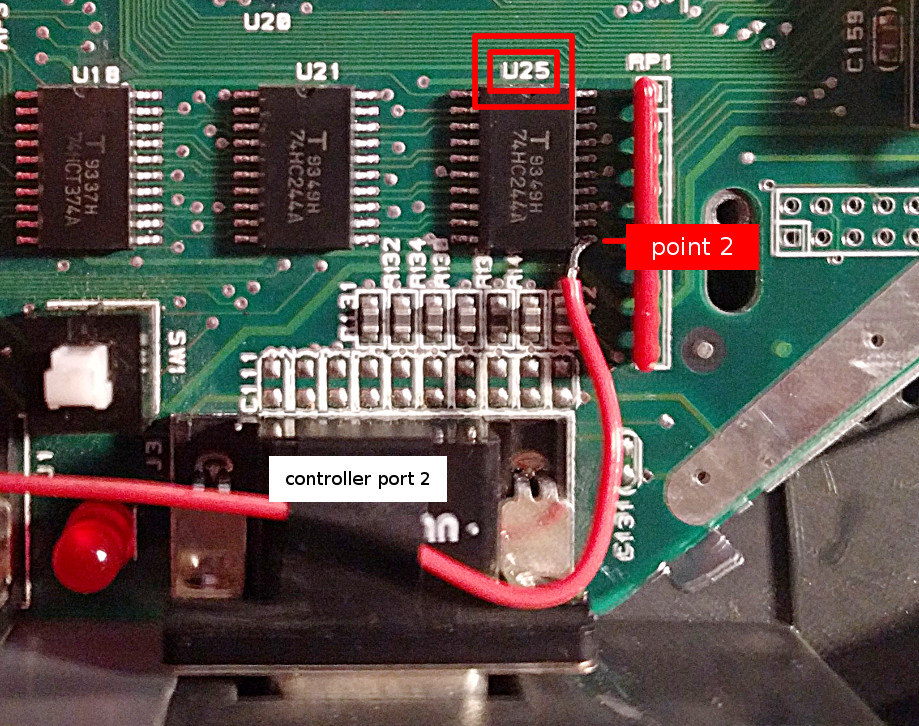
Soldering point 2 is a bit trickier, and requires a steady hand, and just the smallest amount of solder. The point is located on chip U25, and is the pin located at the bottom right (please refer to the image below for reference). What I did was apply a bit of solder to the tip of my soldering iron, and then, while holding the wire to the pin, dabbed the point until the wire sticks to the pin of the chip. Try to avoid getting solder on any of the other surrounding pins, it might cause the Jaguar to produce more intoxicating fumes than it usually does.
Tidying up
As you can see in the picture below, I brought the wired around the left edge of the console in order to avoid any potiention electrical problems in the future. And I used tape to hold it in place. On the left side of the RF module box, there is an opening big enough to allow the wire to pass through to the inside of the back when you place the metal cap back on.

I hope others find this modification useful. It is entirely reversible by desoldering the wire, no problem. Also, no worries about cutting a nasty hole in the side of your gorgeous console shell. If you run into problems with this mod, or think that this isn’t a good idea, please let me know. Here is a video showing the mod in action.