Atari ST | SatanDisk Partition Loss Fix/Modification
So I have had my SatanDisk for about a year now, and it has been an absolute joy to use. Transfering files to and from my Atari ST to a modern computer is a snap. It allows me to work on my pixel art easily (I need to post some of this some day…), and allows me to back up my programming work easily as well. If you are still and avid Atari ST owner, I highly suggest at least getting this. There are some better options out there now (like UltraSaTan and CosmosEX), but this one is so simple to use, and relatively cheap to get.
With all that it has going for it though, there is one thorn I haven’t been able to pull out since the day I bought it. Seemingly random partition table loss on the SD card, making data hard to restore without using a hex editor. Sometimes the partition table becomes corrupted when I power everything down, or forget to power off the SatanDisk before pulling the SD card. All I know for sure is that it is happening, and I am not the only one who has had an issue with it.
When I set out to see if others were having a similar issue as I was, information was sparse. Most people were complaining about a flaky DMA chip (way over my head kind of stuff), but all these users were dealing with STe and Mega ST’s, I am still using my lowly 520ST. Then when poking around Jookie’s site (the creator of the SatanDisk, there was a listing in the Download section about someone else having the same problem as me, and on the 520ST.
After examining the two pictures included in the fixes ZIP file, I soon realized that the SatanDisk I had bought from this seller on Ebay (seller: darekp324 ) was using a different PCB layout than the original schematics. This is the main reason why I am doing this post, to help those who may have bought the same model of SatanDisk I did. This mod keeps the SatanDisk from ruining the partition table on the SD Card. Lets get started.
Tools and Supplies
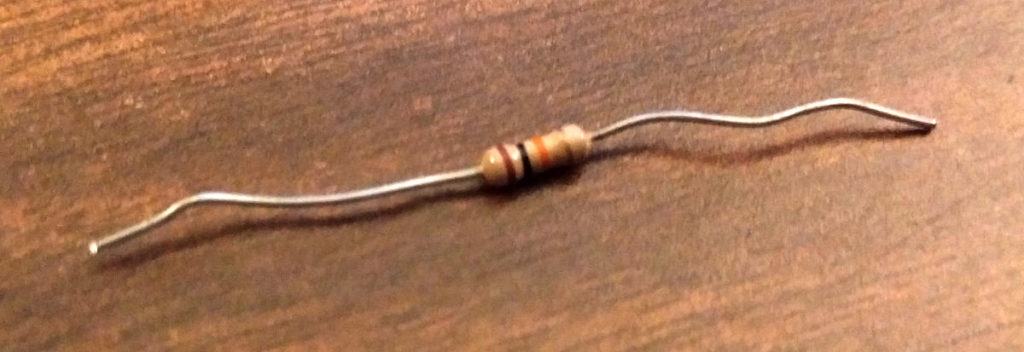
You will need your trusty soldering iron and some solder. A pare of wire snips, and a 10K ohm resistor (colors: brown, black, orange, gold). A small flat head screw driver and a hammer.
Opening the Case
The maker of this particular SatanDisk decided that a permanently sealed 3D printed case was the solution to encasing this wonderful device unfortunately. And if you are worried about damaging it a little bit, then this isn’t the tutorial for you. We will need to take the top and bottom layers of the case off.
Put the case on it’s side and using the the flat head screw driver, find a point to split the case open about 1/2 cm from the top of the case. A couple taps of the hammer on the screw driver should begin to drive the layers apart. Now just work your way around the edges, separating the top from the rest of the case. Do this for the bottom of the case as well.
Soldering Points
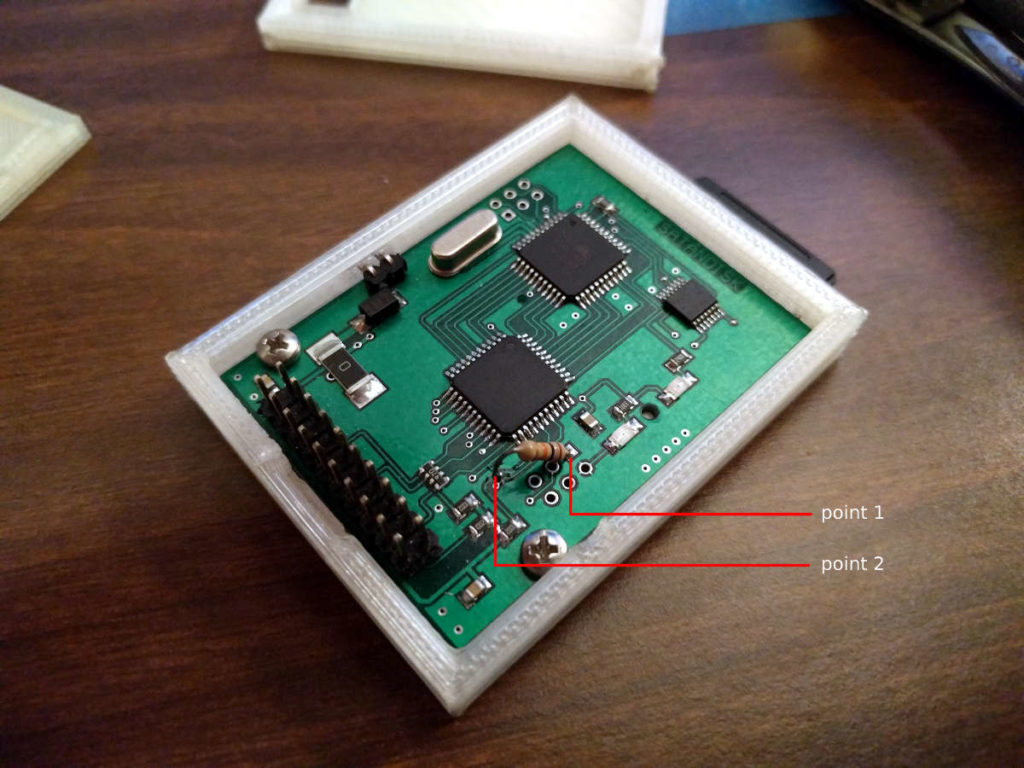
This is where you will save a bit of time, about 10 minutes, because I was able to determine where to attach the resistor after following a few traces. Here is a picture. Solder at the points marked. Point 1 is a through-hole, and you will be soldering on the back, while point 2 is on the top surface of the PCB and will require very little solder to attach your resistor to it.
After soldering your resistor, you will be done. I just used some tape to put the case back together, or move it to a different case, and you are good to go.
Fairly easy, and I hope it saved you a bit of time. I have tested it somewhat thoroughly. Pulling out the SD card while everything is powered on, power cycling the SatanDisk, etc… and the partition table lived through it all. Please let me know if it didn’t work for you, so I can reassess where the resistor needs to be soldered. Time to go play some Rodland.


