Its always good to think about how we do things. Giving a little self-assessment can help us grow faster than we were before, and help us do our work more effectively, especially on how to sketch. So I thought I would present you all with my sketching structure. What I use and how I sketch currently. I will cover both my digital and real mediums. And I will provide a short list of things to consider when buying art supplies, and how to prepare to sketch.
I hope I can spur up some thought, on your end, that might help or encourage the way you do things. And, sorry to disappoint, but this is not about how I sketch, or my process of sketching. But what I will be talking about will get you started, and help you get settled in a way of sketching.
This is certainly not one of my usual, shorter posts, so take it in small chunks, and absorb it the best you can. I tried to be as to the point, as much as possible, without leaving out things that I think might help others in their sketching processes.
For example. If you are focusing on gesture drawing, you might not need much more than a 8″ x 10″ sketchbook and a pencil. The pencil doesn’t really need an eraser in this case. Since you are probably trying to capture a gesture in a few seconds or less, and being outside, drawing people, there is usually no time to erase.
But in contrast. If you are doing charcoal/graphite portraits, you will most likely have both a small and large format sketchbook, blending stub, several different pencils or charcoal sticks, kneed eraser, etc…
And there will be times where all you need is an Etch a Sketch.
What I am getting at, is this post is just to show how I go about sketching, currently. And my methods change constantly. Gotta stay fresh.
 When I started seriously drawing and sketching, about 13 or 14 years ago, all I had was print paper and a pencil. I really had no comprehension of what kind of tools were available to artists, and really just found what I could around the house. This habit has stuck with me. Having loose sheets for sketching is not always the best way. Simply because you might lose that sketch and it isn’t the most convenient outside. But I have found that paper protectors, a binder and a little bit of effort will keep you from losing your sketches. I have always liked the feeling of loose sheets, it makes the sketch feel like something that could be framed, if need be. It also makes storage easier. The other reason I prefer this method is because you don’t have rings or the binding of a book to hinder the movement of your hand or arm. A problem that I am plagued with when using smaller sketchbooks. Some things to keep in mind when drawing on loose sheets.
|
The reason I use a larger sketchpad is to practice using my shoulder more than my wrist. I have found, when I use a smaller sketch books, it is harder to use your shoulder. Simply because there is less room to make the larger movements of the shoulder. I also use a 24″x36″ sketchpad for detailed portraits in charcoal and graphite. This is something that most classes will require you to have. And it does feel cool to be drawing that big anyways. It is always a good investment, if your planning on taking smaller sketches and making them bigger, or you are drawing from life. As for brand or what kind of paper you want in a sketchbook. I don’t know too much about those things. Only that there are differences in pricing. I usually pick a mid priced sketchbook, because it seems if you invest a little bit more you get a better product. A fine tooth paper has worked for just about everything that I have done. But it will take a far more experienced person to explain the differences and the uses of the different paper weights available. Anyone who is reading this, if you have references or advice on this matter, please let us know. A few things to keep in mind when you are buying a sketchbook/pad:
Hereis a simple list of some sketchbooks and their differences. |
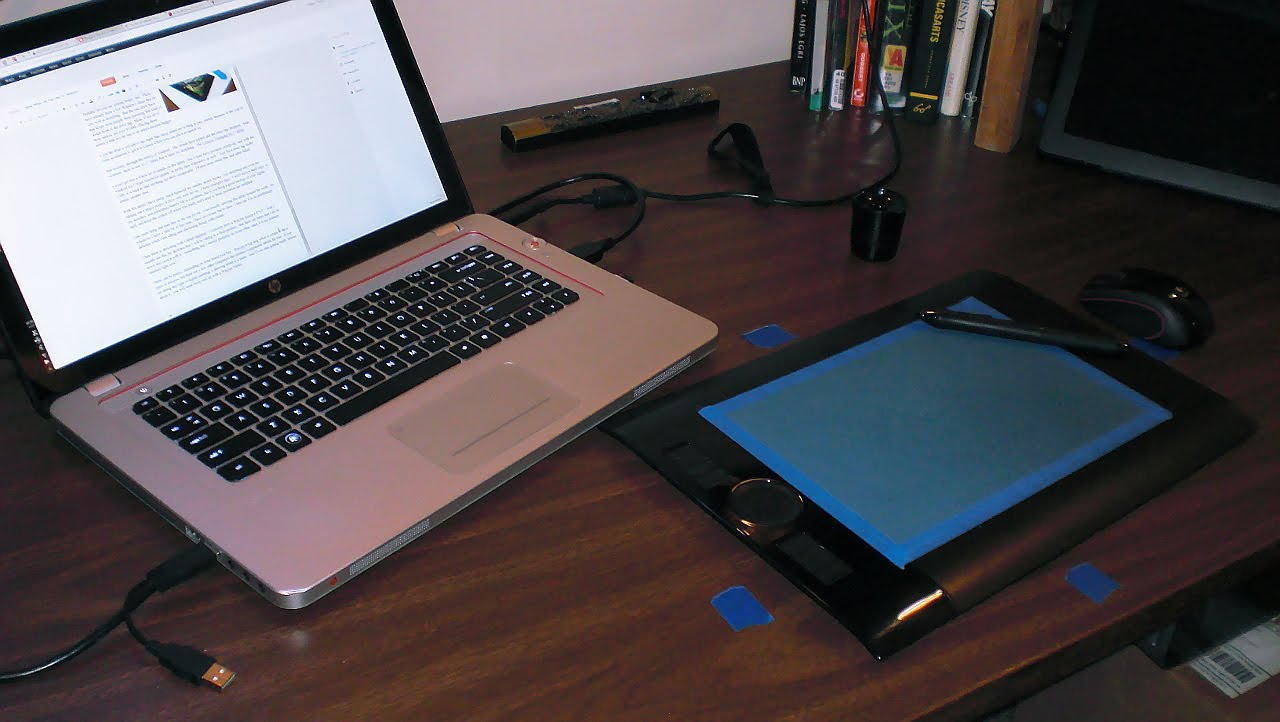
Not very complicated huh. In most cases, it doesn’t need to be. I always tell myself when I am at the store looking at art supplies, it isn’t the tool, but the person who is using the tool that makes the difference. This goes for just about any medium in any situation. Now, I know that this little piece of advice doesn’t necessarily go for larger more serious projects and the materials you will use for them. But for sketching, no need to get too expensive. Its just practice. A small note about the red pencil in the picture. If you have taken a 2D animation course, or read about the process of making 2D animation, you will know that they use different color pencils for various things. It basically breaks the animation process down into visual steps. To me, starting my sketches in red, tella me that this is not a final drawing, and changes can be made. It also helps me not to worry about mistakes. Normal lead is stark. If you lay down a line on a white piece of paper, that line will scream at you until you add some more lines. One of the ways I avoid that feeling is by using a red pencil for my initial sketches. Less intimidating than normal graphite. Another important tool for maintaining your artwork is a fixative. This comes in an aerosol can, and is usually for charcoal, graphite, color pencil and pastel work. You can also use hairspray to do the same thing. But there are some things to take into consideration before you use hairspray. Here will explain. |
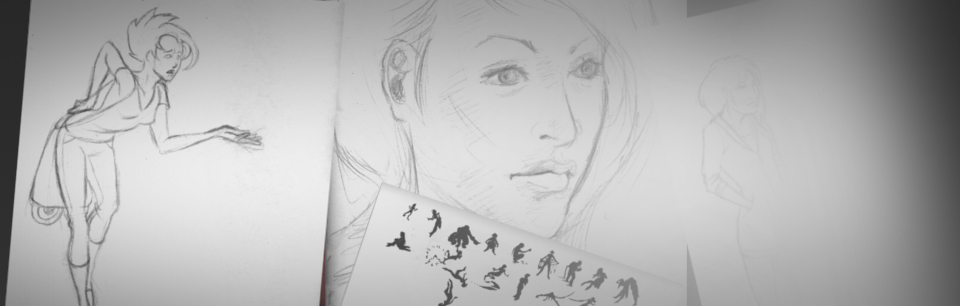
Portable devices are getting better, fast. There have already been a few Windows slates that do very well at sketching. But the one draw back that keeps most people from pursuing this kind of sketch book is the price tag. Most, if not all of these tablets, are over $1000. Placing these tablets a little too far out of an artist’s modest budget. Even the iPad is still above the mark that many artists are willing to pay, mainly because of the cost of extra accessories to get it to a point where you can use it to sketch on. But recently, through the mercy of Android. The clouds have parted and the price has dropped. And, currently, there is one 10.1″ tablet that is ideal for sketching. The Lenovo Thinkpad 10.1″ tablet. I won’t get into a whole lot of details on this tablet. But it does have pressure sensitivity, and with the Android Ice Cream Sandwich update, its pretty darn responsive as well. And for a price tag under $300, it is hard to find anything out there comparable. I’ll post more about this, and other future tablets, another time. With this tablet I have pretty much replaced my smaller sketch books. For sketching and even for starting out a larger project it does very well for me. I have examples here. I don’t have a hard copy of my sketches, and sometimes battery life is a problem, but if you keep a good backup of your digital stuff, and keep the system off when you really don’t need it, these problems are nullified. One more thing that puts this on the top for me. I am usually carrying this tablet around for work. So whenever I have a little bit of free time, I have no excuse but to draw. I also use it to do preliminary sketches when I am sitting and discussing things with clients.
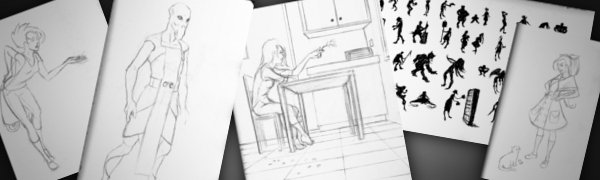
These can be pricey, depending on what brand you buy. Wacom is top dog when it comes to these types of devices, but there are a few other companies the produce comparable tablets for less. If you are doing any type of digital painting, a drawing tablet is a must. And if you start getting really serious about it, you will most likely end up with a Wacom Tablet. Here is an example of one of my sketches on this drawing tablet. And for anyone who is interested in what software I use. Adobe Photoshop, Adobe Illustrator, Inkscape, The Gimp, Mypaint, Alchemy, Krita and Blender. Any one of these programs can be used for sketching, to one extent or another. I tend to lean towards all of the open source packages, because it makes me feel better inside, helping out those communities. But the Adobe products have many things that open source is catching up to. If you going to be sketching digitally though, there is no reason to drop a few hundred dollars into a professional package. Its just practice, right?
Sketching is such an organic process. Both how and what you sketch with can, and probably should, change constantly. If you are an aspiring artist, strive to be a sketch artist. This will often be the basis of everything you produce. And I hope that something in this article could help you something. I know that just by writing this, I learned a few things about myself. To teach is to learn. If you have any questions and comments, feel free to leave them. I am not the most authoritative voice out there, but I will do the best I can to respond. |