William Thorup

Illustrator, Motion Graphics Designer, Animator, and VFX Artist

Category: Sketch

  • Pira Tess, Space Brigand | CGHUB CharacterFORGE 2D Entry

    Pira Tess, Space Brigand | CGHUB CharacterFORGE 2D Entry

    Another CGHUB competition piece, done in the Gimp.  You can check the finals thread here.  Everyone’s pieces should be posted by the end of the day tomorrow.

    I don’t think I will get many votes, simply because of the amount of other great artists on the thread this time around.  But it is good to see the different techniques and styles involved.  I can obviously see where I need to improve.  Its a humbling experience every time I enter one of these kind of things.


    In that respect, it seems that every painting I do, I see allot of personal progress.   Getting my nose into those books, practicing the techniques presented, and analyzing great artists, has been a huge boost to my learning process.  And I am loving every second of it.


    Sorry for the jumping around towards the middle of the video.  When you are getting into details, it is hard to avoid.  But I did go through over 10 hours of footage to improve it the best I could.


    One other thing I would like to mention is one of the artists in particular, mdonze.  This artist made an interesting post about his painting here.  Beside the painting being amazing, in my opinion, he used a process similar to the way a 3D application would render and image out.  I have heard about this process before, but this is the first time that I have actually seen it used for a 2D piece.  And somewhat explained.


    This is something that I am planning on practicing in the future.  I do have an idea of how a computer pushes a 3D scene through passes (specular, ambient occlusion, color, alpha, etc…).  And I think a technique like this will help me use both my 3D experience with my illustration to improve my skill set.

  • Now, What Do You Use To Sketch?

    Now, What Do You Use To Sketch?

    Its always good to think about how we do things. Giving a little self-assessment can help us grow faster than we were before, and help us do our work more effectively, especially on how to sketch. So I thought I would present you all with my sketching structure. What I use and how I sketch currently. I will cover both my digital and real mediums. And I will provide a short list of things to consider when buying art supplies, and how to prepare to sketch.

    I hope I can spur up some thought, on your end, that might help or encourage the way you do things.  And, sorry to disappoint, but this is not about how I sketch, or my process of sketching.  But what I will be talking about will get you started, and help you get settled in a way of sketching.

    This is certainly not one of my usual, shorter posts, so take it in small chunks, and absorb it the best you can.  I tried to be as to the point, as much as possible, without leaving out things that I think might help others in their sketching processes.

    When it comes to drawing a sketch, my habits and process are constantly changing. This is my nature, as I am trying to improve my methods and discover new tricks and tips. Also, what I use and how I sketch are often influenced by what I am currently studying.

    For example. If you are focusing on gesture drawing, you might not need much more than a 8″ x 10″ sketchbook and a pencil. The pencil doesn’t really need an eraser in this case. Since you are probably trying to capture a gesture in a few seconds or less, and being outside, drawing people, there is usually no time to erase.

    But in contrast. If you are doing charcoal/graphite portraits, you will most likely have both a small and large format sketchbook, blending stub, several different pencils or charcoal sticks, kneed eraser, etc…

    And there will be times where all you need is an Etch a Sketch.

    What I am getting at, is this post is just to show how I go about sketching, currently. And my methods change constantly. Gotta stay fresh.

    • When I was Your Age…

    When I started seriously drawing and sketching, about 13 or 14 years ago, all I had was print paper and a pencil. I really had no comprehension of what kind of tools were available to artists, and really just found what I could around the house. This habit has stuck with me.

    Having loose sheets for sketching is not always the best way. Simply because you might lose that sketch and it isn’t the most convenient outside. But I have found that paper protectors, a binder and a little bit of effort will keep you from losing your sketches. I have always liked the feeling of loose sheets, it makes the sketch feel like something that could be framed, if need be. It also makes storage easier. The other reason I prefer this method is because you don’t have rings or the binding of a book to hinder the movement of your hand or arm.  A problem that I am plagued with when using smaller sketchbooks.

    Some things to keep in mind when drawing on loose sheets.

    1. No commitment.  The sketch is loose, and you don’t have to risk ruining a sketchbook removing a sketch you don’t want.
    2. Make sure that the paper you are using is acid free.  Most print paper should be, but I have been surprised too many times not to give this warning.
    3. A clean surface to draw on.  I just bought a piece of sturdy particle board, which I happen to use to attach small water color projects to, as well.  Now I don’t have to worry about the tably I am drawing on, being dirty, I brought my own table!
    4. Stick to standard paper sizes, like 8.5″x11″.  Going any bigger can be difficult to store and protect.  They do make binders and paper protector sizes for bigger and smaller formats, but these will tend to be harder to find and a bit more expensive.

    • My Basics

    The picture, to the right, is my basic setup. For when I have some time set apart for sketching. This includes a 18″x24″ sketchpad, a red lead pencil and a few other tools.  I will talk more about my tools in a moment.

    The reason I use a larger sketchpad is to practice using my shoulder more than my wrist. I have found, when I use a smaller sketch books, it is harder to use your shoulder. Simply because there is less room to make the larger movements of the shoulder.

    I also use a 24″x36″ sketchpad for detailed portraits in charcoal and graphite.  This is something that most classes will require you to have.  And it does feel cool to be drawing that big anyways.  It is always a good investment, if your planning on taking smaller sketches and making them bigger, or you are drawing from life.

    As for brand or what kind of paper you want in a sketchbook. I don’t know too much about those things. Only that there are differences in pricing.  I usually pick a mid priced sketchbook, because it seems if you invest a little bit more you get a better product.

    A fine tooth paper has worked for just about everything that I have done. But it will take a far more experienced person to explain the differences and the uses of the different paper weights available. Anyone who is reading this, if you have references or advice on this matter, please let us know.

    A few things to keep in mind when you are buying a sketchbook/pad:

    1. Think of scale and detail. Obviously you will want your drawing to be a certain size. But also keep in mind, that the larger the paper the more detail you can include in your drawing. A smaller sketchbook only allows for so much detail.
    2. Pick your binding. There are hardcover, tape bound, and ring bound sketchbooks.
      1.  Hardcover is the most permanent, and will keep the pages from rubbing together. Protecting any graphite sketches you might have. But, depending on the size of the sketch book, it might be hard to get the pages to lay flat, if the binding is really tight or the book is too thick.
      2. Tape bound is similar to hardcover, but it often allows you to remove your sketches more easily.  Good for classes and if you need to present or store your sketches separately.
      3. Ring bound sketch books make the sketching experience more enjoyable.  Simply because the pages always lay flat, and your hand will never run into anything, on the top or side of the page, that is distracting.  But the pages do have some room to slide around.  If you have any unfixed graphite sketches, they will get smeared and basically ruined.
    3. Think about how you are going to store you sketchbooks after they are used.  If your going to throw away all your hard work, don’t worry about it, but larger sketchpads can be difficult to protect.  Buying a similar size portfolio case is a good option but not always the best.  I have found the plastic storage containers are better (And cheaper).  They are ridged and mostly waterproof.  Truly protecting your larger sketchbooks.

    Hereis a simple list of some sketchbooks and their differences.

    • Tools for the Job

    There are hundreds, if not thousands, of different tools an artist can buy. So the question you have to ask yourself. What do I want to do? If you are planning on sketching, a few different pencils and pens will usually do the job.  Refer to the picture to get a look at my arsenal.

    Not very complicated huh.  In most cases, it doesn’t need to be.  I always tell myself when I am at the store looking at art supplies, it isn’t the tool, but the person who is using the tool that makes the difference.  This goes for just about any medium in any situation.  Now, I know that this little piece of advice doesn’t necessarily go for larger more serious projects and the materials you will use for them.  But for sketching, no need to get too expensive.  Its just practice.

    A small note about the red pencil in the picture.  If you have taken a 2D animation course, or read about the process of making 2D animation, you will know that they use different color pencils for various things.  It basically breaks the animation process down into visual steps.  To me, starting my sketches in red, tella me that this is not a final drawing, and changes can be made.  It also helps me not to worry about mistakes.

    Normal lead is stark.  If you lay down a line on a white piece of paper, that line will scream at you until you add some more lines.  One of the ways I avoid that feeling is by using a red pencil for my initial sketches.  Less intimidating than normal graphite.

    Another important tool for maintaining your artwork is a fixative.  This comes in an aerosol can, and is usually for charcoal, graphite, color pencil and pastel work.  You can also use hairspray to do the same thing.  But there are some things to take into consideration before you use hairspray.  Here will explain.

    • Digital Sketching | The future?

    Real mediums will never go our of style.  But if you have a little more money to spend, I highly suggest what I will talk about next.

    Portable devices are getting better, fast.  There have already been a few Windows slates that do very well at sketching.  But the one draw back that keeps most people from pursuing this kind of sketch book is the price tag.  Most, if not all of these tablets, are over $1000.  Placing these tablets a little too far out of an artist’s modest budget.

    Even the iPad is still above the mark that many artists are willing to pay, mainly because of the cost of extra accessories to get it to a point where you can use it to sketch on.

    But recently, through the mercy of Android.  The clouds have parted and the price has dropped.  And, currently, there is one 10.1″ tablet that is ideal for sketching.  The Lenovo Thinkpad 10.1″ tablet.

    I won’t get into a whole lot of details on this tablet.  But it does have pressure sensitivity, and with the Android Ice Cream Sandwich update, its pretty darn responsive as well.   And for a price tag under $300, it is hard to find anything out there comparable.  I’ll post more about this, and other future tablets, another time.

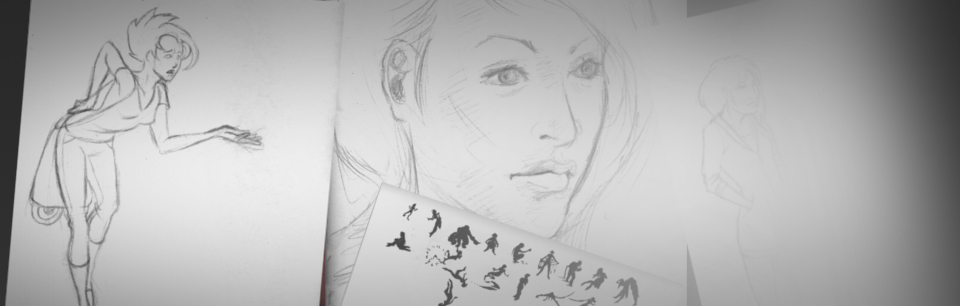
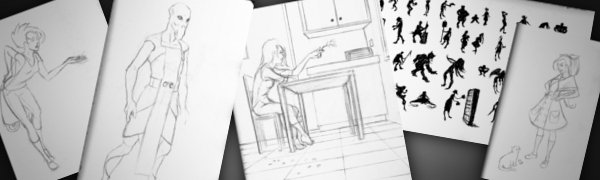
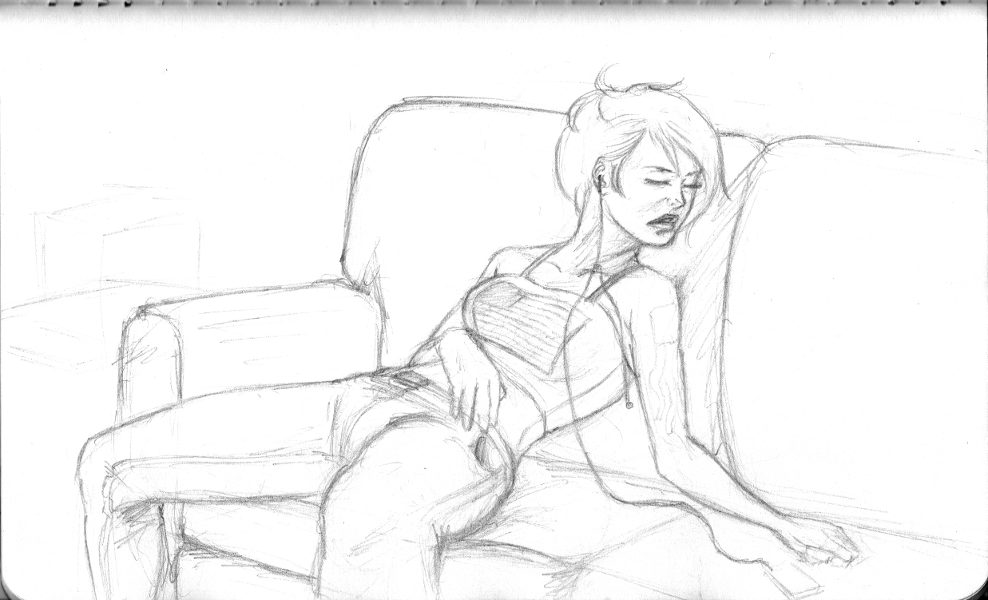
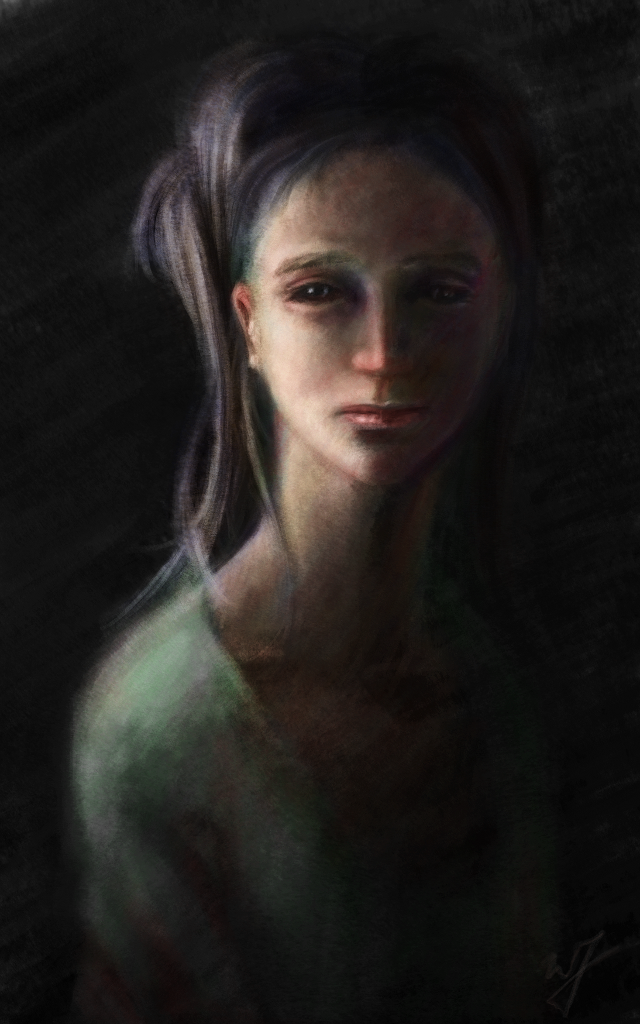
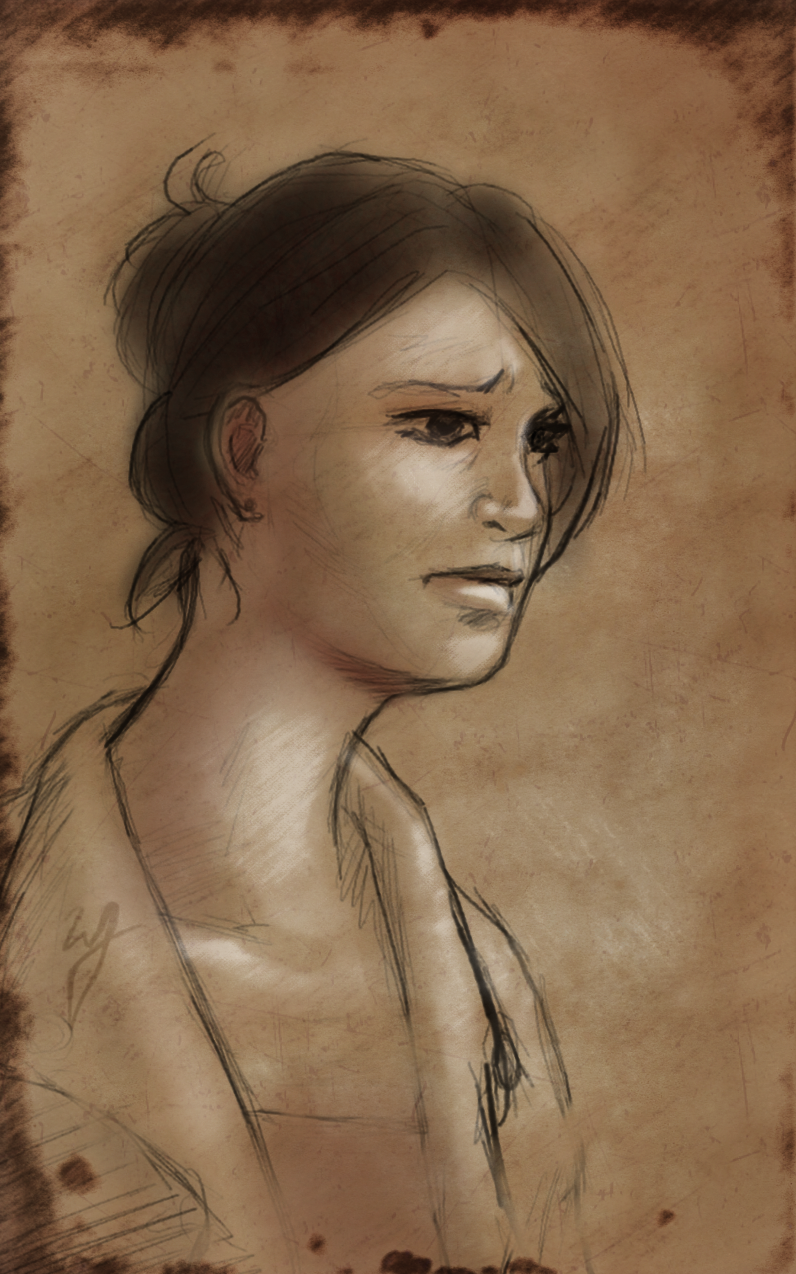
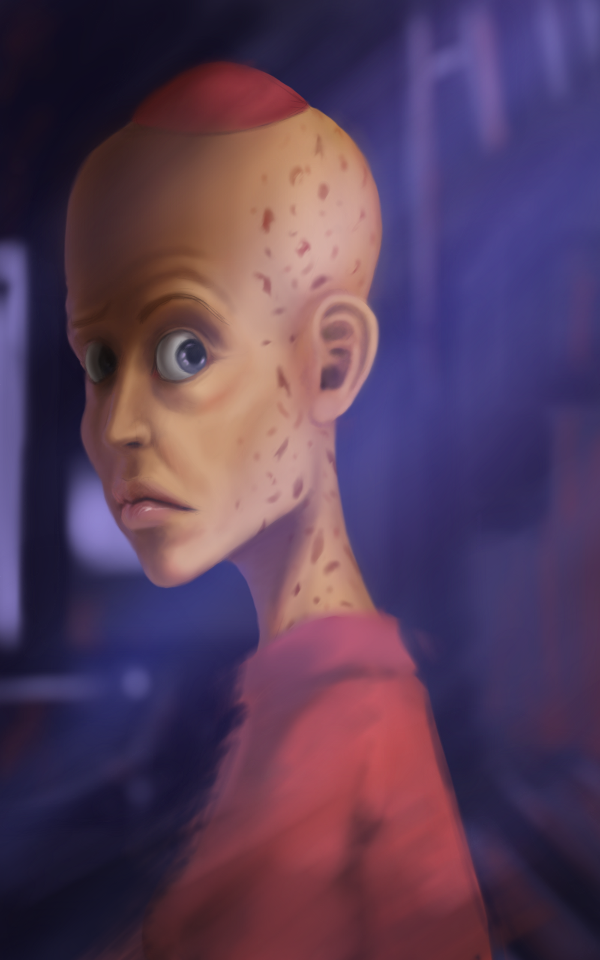
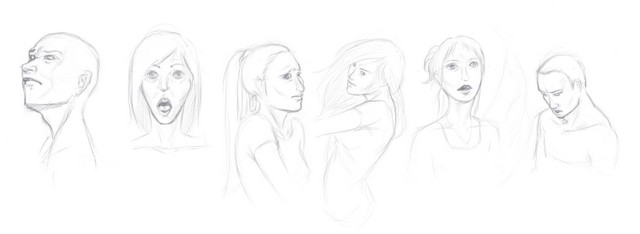
    With this tablet I have pretty much replaced my smaller sketch books.  For sketching and even for starting out a larger project it does very well for me.  I have examples here.  I don’t have a hard copy of my sketches, and sometimes battery life is a problem, but if you keep a good backup of your digital stuff, and keep the system off when you really don’t need it, these problems are nullified.

    One more thing that puts this on the top for me.  I am usually carrying this tablet around for work.  So whenever I have a little bit of free time, I have no excuse but to draw. I also use it to do preliminary sketches when I am sitting and discussing things with clients.

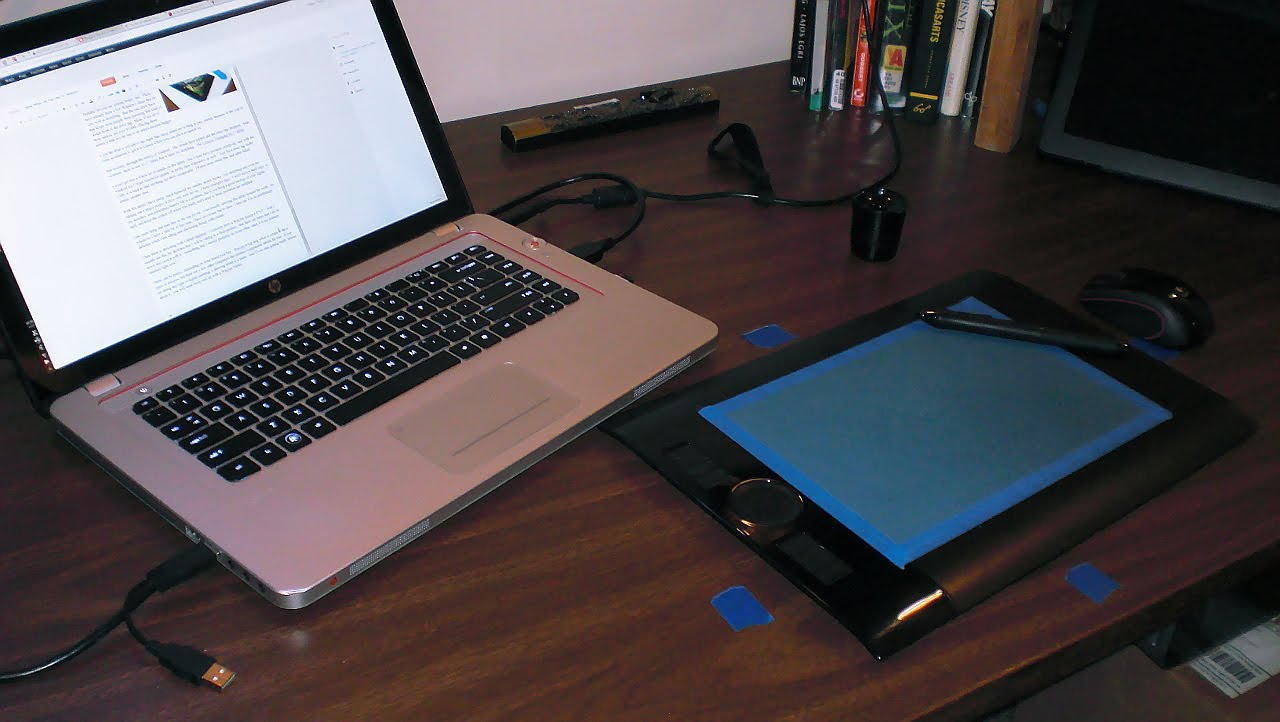
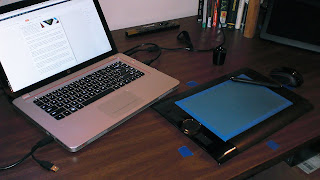
    Then there is sketching with a tablet digitizer.  I currently have a Wacom Intuos 4 8″x5″.  And I usually use this for sketches that I will be taking to a final product.  But there are times that I do sit down and sketch with it.  Something that I should probably do more often, since it is my primary medium right now.

    These can be pricey, depending on what brand you buy.  Wacom is top dog when it comes to these types of devices, but there are a few other companies the produce comparable tablets for less.  If you are doing any type of digital painting, a drawing tablet is a must.  And if you start getting really serious about it,  you will most likely end up with a Wacom Tablet.

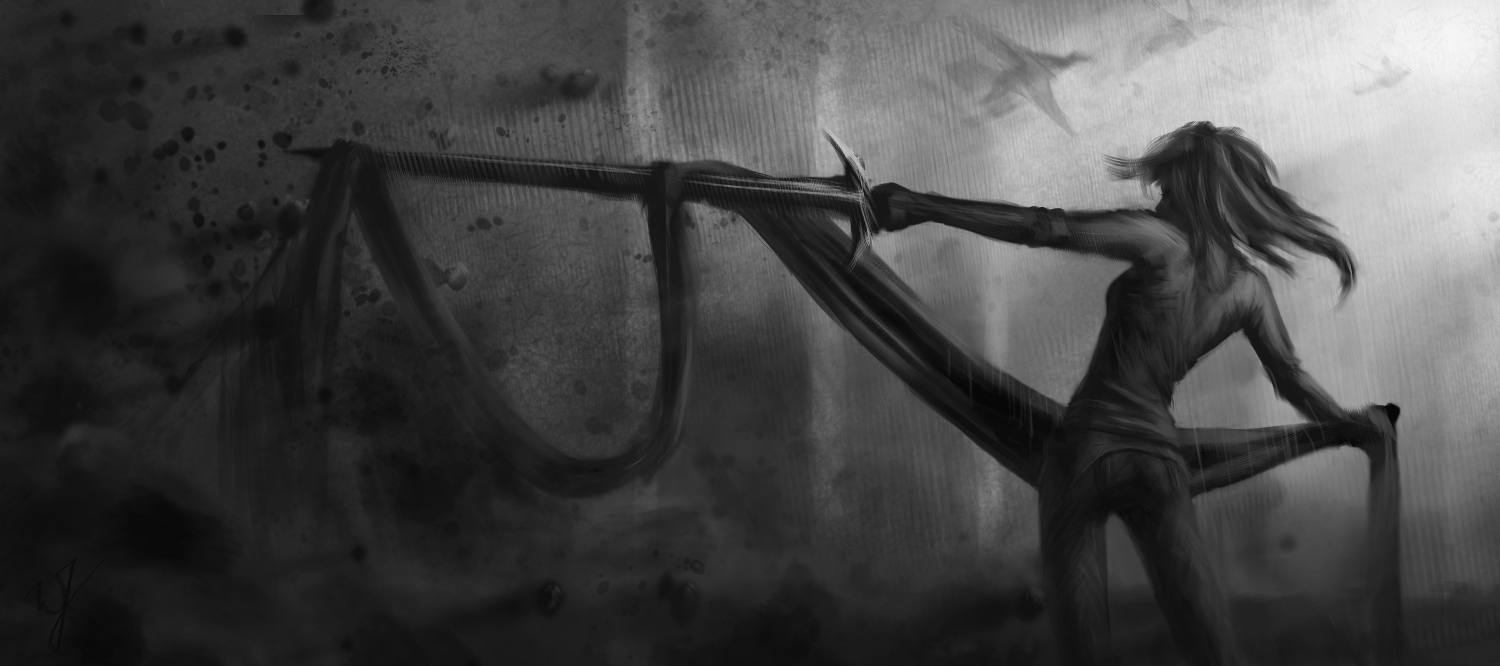
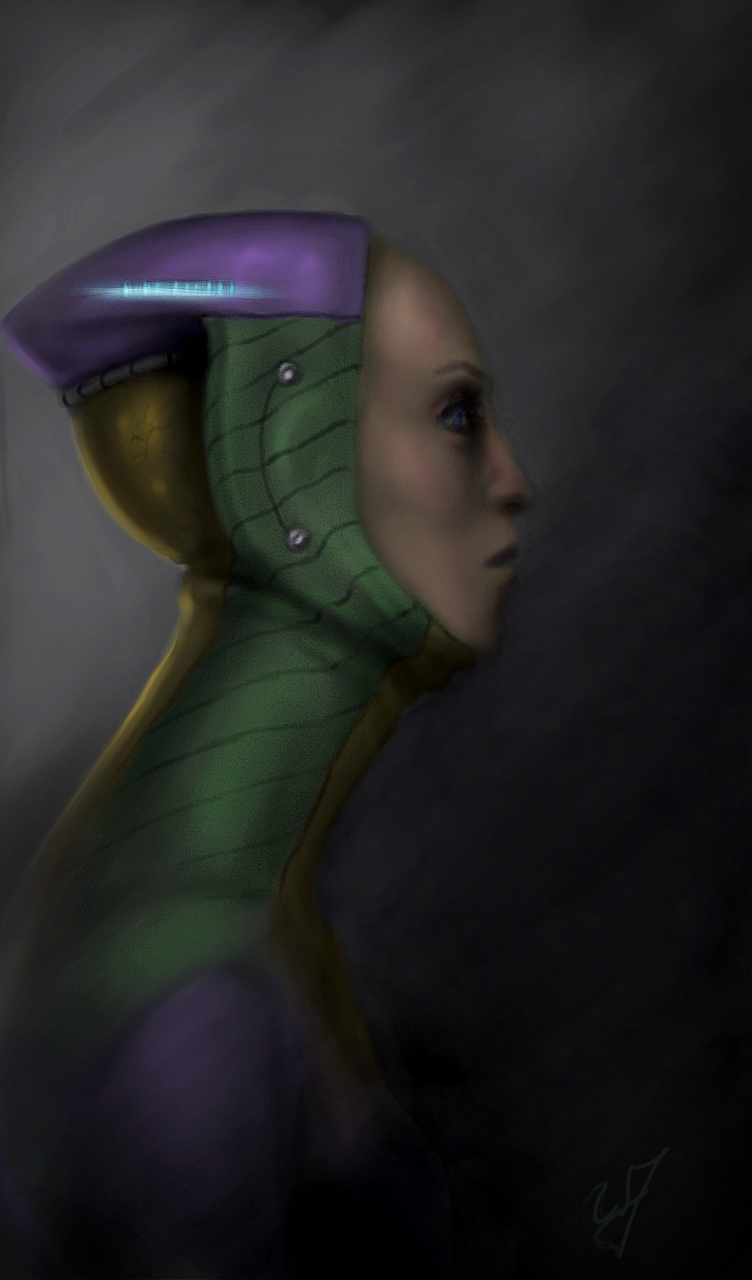
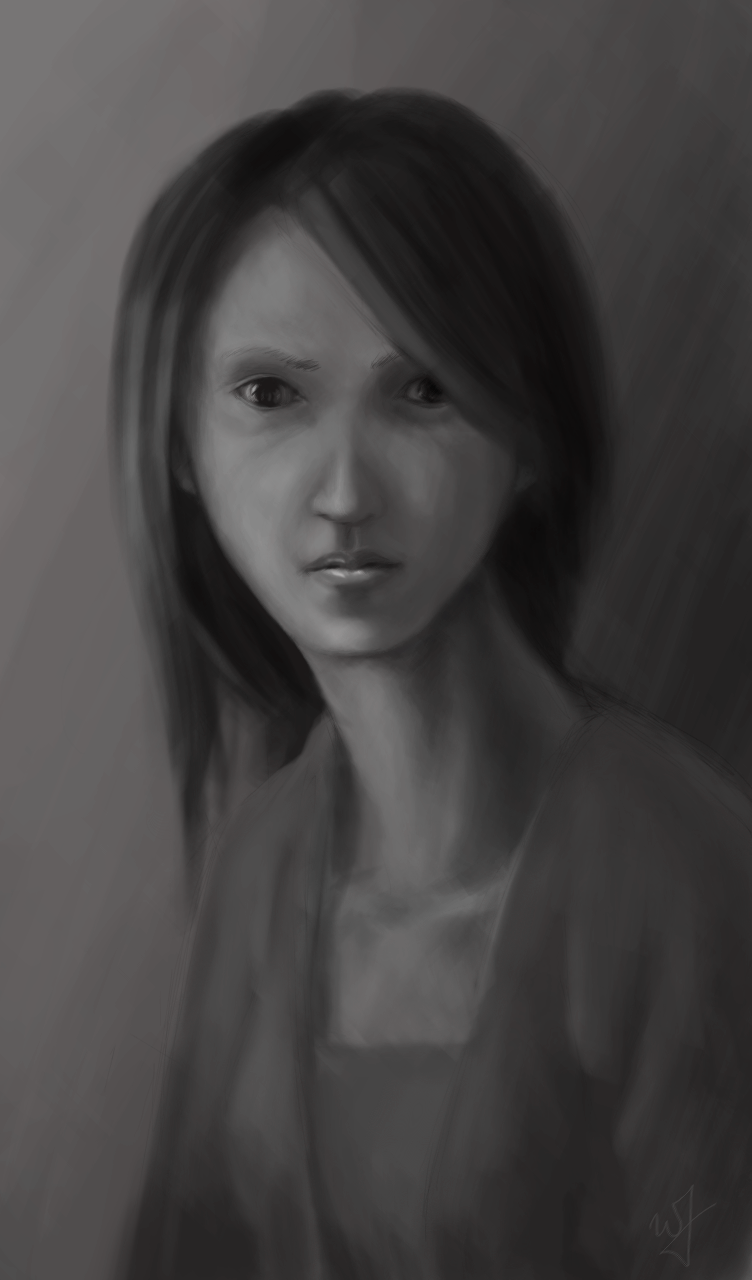
    Here is an example of one of my sketches on this drawing tablet.

    And for anyone who is interested in what software I use.  Adobe Photoshop, Adobe Illustrator, Inkscape, The Gimp, Mypaint, Alchemy, Krita and Blender.    Any one of these programs can be used for sketching, to one extent or another.  I tend to lean towards all of the open source packages, because it makes me feel better inside, helping out those communities.  But the Adobe products have many things that open source is catching up to.  If you going to be sketching digitally  though, there is no reason to drop a few hundred dollars into a professional package.  Its just practice, right?

    • Conclusion

    Sketching is such an organic process.  Both how and what you sketch with can, and probably should, change constantly.  If you are an aspiring artist, strive to be a sketch artist.  This will often be the basis of everything you produce.  And I hope that something in this article could help you something.  I know that just by writing this, I learned a few things about myself.  To teach is to learn.

    If you have any questions and comments, feel free to leave them.  I am not the most authoritative voice out there, but I will do the best I can to respond.

  • The Lack Thereof | Things are coming

    The Lack Thereof | Things are coming

    Some of you might be thinking, that Will has passed away.  Or, how dare He leave us in the dark on what is happening in his world.  Well, there probably isn’t anyone out there who thinks that, but I do feel bad, some days, for not consistently posting.


    Things are happening though, and that is a good sign for me.  I got another commercial to post, two more Android apps by Thor Media, and some art as well.  Also, as I have mentioned before, I still want to do some videos for the Lenovo Thinkpad Tablet.  And focus on Sketchbook Pro and Photoshop touch with an artist/illustrator’s perspective.  I truly am in love with the device.  It has made such a good digital sketchbook.

    Also, on that note, I am planning on writing about some of the pros and cons to having a portable digitizer as a sketch book, instead of a normal sketchbook and pen/pencil.  As, I can’t find much about the subject on Google.

    And one more topic I would like to cover in the near future is my current operating system that I use for the bulk of my work.  Kubuntu.  I have bee using it for a few months now, and have a good grasp on what I like and don’t like about it.


    Then, I have one more surprise up my sleeve, that should make things feel better.  For me and for you.

    Thank you all for stopping by and taking interest in what I have to say.  Just knowing that there are people that take interest in my stuff makes all the difference.  Its encouraging, and I hope that I can return the favor.

  • Charcoal Drawing (Gimp Paint Studio 2.0)

    Charcoal Drawing (Gimp Paint Studio 2.0)

    Yes, another portrait.  I just cant’ express the feeling I get when I begin to see a face come out of the blank canvas.

    I actually tried to do a time lapse on the last painting that I did.  But I couldn’t get a desktop recorder to work correctly in Kubuntu.  But I managed to get something working this time around, so, ounce again, I can share my process with everyone.

    I really enjoyed the charcoal presets in Gimp Paint Studio 2.0.  I think I managed to get a very realistic medium look with this preset.

  • Rope the Beast | Gimp Paint Studio 2.0

    Rope the Beast | Gimp Paint Studio 2.0

    This painting was done in Gimp Paint Studio 2.0 (GPS), and took approximately 3 hours to complete.

    This calls for celebration! Mr. Ramón Miranda was so kind to port Gimp Paint Studio (GPS) over to Gimp 2.8.

    For those of you who aren’t in the know on this. This is a wonderful set of brushes, color pallets and a slew of other stuff, geared for artists that use the Gimp. I really enjoyed using Gimp Paint Studio with Gimp 2.6, but when the move was made to Gimp 2.8, some of the functionality for the predefined brushes were broken. rendering it useless for my work flow.

    But the sun does come up in the morning, and this wonderful man has done a great favor for us all. And I dedicate this painting to him.

    ____________________________________________________________________________________________________

    For those of you who are interested in installing it, it is really easy.

    First go to the download page HERE

    And download these files:

    • sessionrc para GPS 2.0
    • GPS_Extras _old
    • GPS_Gimp_Paint_Studio_2_0
    When you are finished downloading the files, unzip them and dump them all in the Gimp 2.8 folder.
    In Linux this is located in you “Home” folder under your username, and it is hidden.  So, you will need to be able to see your hidden files.  To do this completely depends on the file browser you are using.  I suggest doing a search to find out how to make hidden files view-able for your specific file manager.
    In windows, by default, it will be located at C:\Documents and Settings\\.gimp-2.8\  .  It is also, most likely, hidden, and you will have to enable ‘view hidden files and directories’ in your view options.
  • Love’in the Lenovo

    Love’in the Lenovo


    Here is a painting (The Runner) and a few sketches I did, all on the tablet.With a total of about 3 hours of work time.  From laying down the initial sketch, painting, touch up, and making this post.  100% Android.

    The Lenovo Thinkpad tablet got its ICS update this past week, and it has made drawing that much more enjoyable.  the stylus is much more responsive, and there are some extra perks in Photoshop Touch, as well.  The button on the stylus is the color dropper tool, and you can see the cursor when you hover over the screen.  Which does help with accuracy.

    And here are some old folk studies that I sketched out on the Lenovo Thinkpad tablet.

  • Adobe Photoshop Touch – Sketch and Review

    Adobe Photoshop Touch – Sketch and Review

    I have been trying out different drawing applications on my Thinkpad.  Seeing what does what, and I thought that I should try Adobe Photoshop Touch and let you all know what I think so far.

    (Done in Adobe Photoshop Touch on a Lenono Thinkpad 10.1 Tablet with stylus)


    I will start with the only function that effects the usually digital painting workflow that I am used to.  Lack of any varity of brushes.  Your left with the basic round brush.  Granted, I use this this kind of brush often, it would be nice to have a pallet knife brush or something of the sort to bring a little variety to edge and texture.  But there is a reason why it is called “Photo”shop, and I understand it isn’t geared to artists like Sketch Book Pro is.  As many photographers have no need for different brushes.
    But, with that being said, I am sure they will probably introduce a way to import .abr files in the future. Or at least provide a basic variety of brushes to choose from, like Sketch Book Pro.
    But for the positives, there are many.  First, the stylus is much more responsive.  I am guessing this is probably a software thing because, even though Sketch Book Pro responds well enough, Photoshop Touch seems to respond better.
    The menus for layers tools and other options, are very thought out, and don’t seem to slow my workflow down.  In contrast, I feel that the way Sketch Boo Pro handles menus seems to slow me down.  Photoshop Touch allows you to quickly hide individual menus independently.  So, if you aren’t messing around with your layer dialog, but you need to be adjusting you brush options constantly, you can hide the layer bar while keeping the brush options open.  I was surprised how useful this function is.  Also, another little plus I enjoy is the full screen mode.  Makes it easy to show off your work with out all the little panels on side ruining the experience.
    There are a variety of blending options for layers, as well as a way to apply effects (dodge/burn) to your brush.  Also, you are given filters (blur, sharpen and other more artistic filters)  along with a host of color adjustment options.  Options you would expect in a photo manipulation program.  And options I would use from time to time, especially the color adjustment options.
    The selection tools are great, none of which I have seen in any other Android painting app.  And you can crop your image as a whole and rotate, scale and adjust layers.
    In my opinion it is one of the best image minipulation apps on the market right now, but with a few downsides for artists.  One being the lack of multiple brush types.  Also, one other downside, I just thought, of is line smoothness.  I am not sure why, but when a line is drawn on the canvas it always comes out a little jittery, and I see this in other programs as well.  Sketch Book Pro compensates pretty good with a line smoothing option.  Photoshop Touch doesn’t have this.  And like many other Android painting apps, the line never seems to come out quite the way you want it.  But it is something that I can adjust to, and for most artists it is definitely not a deal breaker.
    But with those few drawbacks aside, it is still a very usable app for sketching and even more complacated pieces of art.
    Again, I am planning on doing a few videos of both apps in action.  State tuned!
  • Thinkpad Sketches

    Thinkpad Sketches

    Again, haven’t been updating much.  I have been busy working as a Digital Imaging Technician (DIT) on the Boys at the Bar film.  A Richard Dutcher film.  Just a few more night shoots, and that will be done.  But on my down time between different shots or when I am not swapping or dumping footage,  I take the time to draw.

    So here are a few sketches and  a more finished painting.  All done on the the Lenovo Thinkpad Tablet, with a pressure sensitive stylus, in Autodesk Sketchbook Pro.


    I picked up the tablet and the pen for about $300, and it has been fantastic.  The lag between the stylus and the actual drawing is practically unnoticeable and I have found it really easy to adjust to.  The only issue I have with drawing on the tablet, actually has nothing to do with the tablet, but with Sketchbook Pro.  It doesn’t have any kind of palm detection.  So, in order to combat this, I am required to wear a cotton glove with the index, middle and ring finder cut off.  This keeps any part of my hand from actually touching the screen.

    But overall, if you want a digital sketchbook, at a really good price, this Tablet is a great choice.  And currently the only choice with pressure sensitivity and a 10.1 inch screen.

    I’ll see about doing some videos of me drawing with this tablet.

  • Light Study

    Light Study

    I love doing portraits without reference.  Every time, I find it exhilarating to see the face that comes out of a random sketch.  I often feel that I am almost obligated to put a story to the face.  I’m trying to develop the habit, when I do paintings like this, to have some sort of story running in the back of my mind.  To drive the emotion of the subject, among other characteristics of the painting.

    Approx. 4 Hours to completion.

    I actually started this light study on my Acer Iconia A500 tablet in Sketchbook Pro, and then transferred it into the Gimp.

  • Expression Sketches

    Expression Sketches

    Sorry for the lack of posts.  Busy on this Templar Nation project.  And there is not allot of drawing mixed into that, unfortunately.

    But here are a few sketches I did today in MyPaint.