William Thorup

Illustrator, Motion Graphics Designer, Animator, and VFX Artist

Category: Tutorial

  • Bidding for a Kickstarter Job | Illustrations & Article

    Bidding for a Kickstarter Job | Illustrations & Article

    Working with Kickstarter, and people who wish to start a campaign, can be difficult. What rewards are you going to provide, how do you get people to take interest in the campaign, how does everyone get there rewards at the end of the day, and how does everyone who worked on on the campaign get paid. The questions go on.

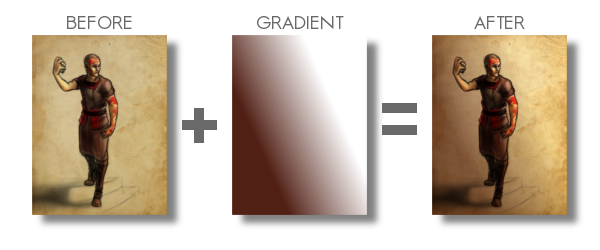
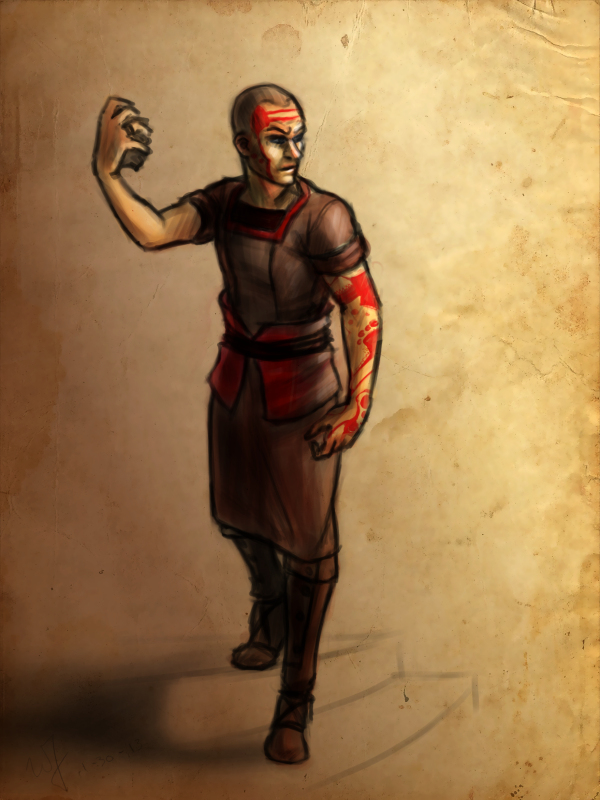
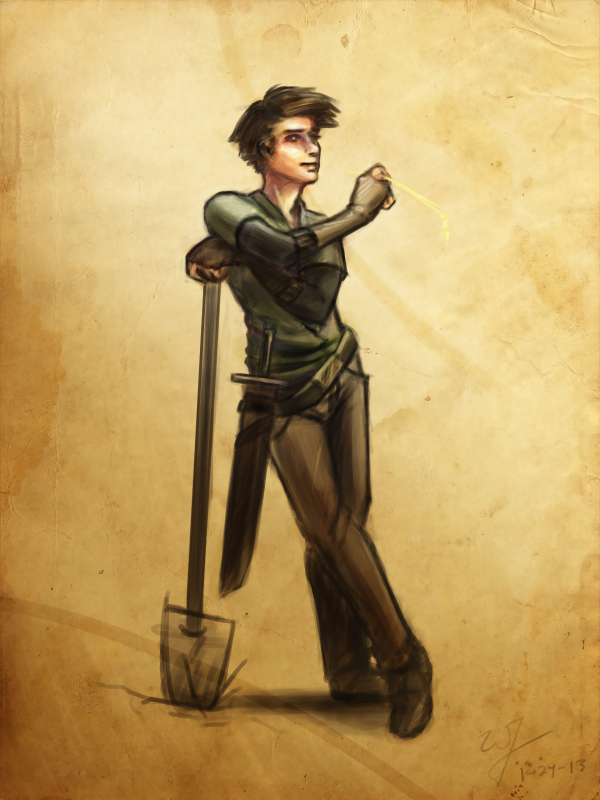
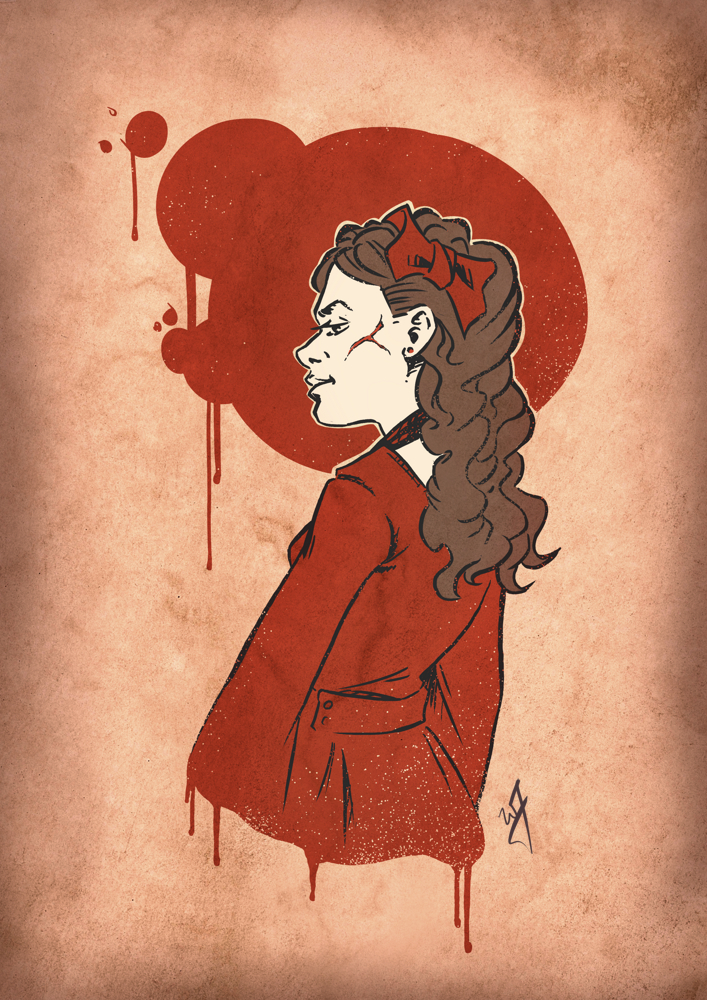
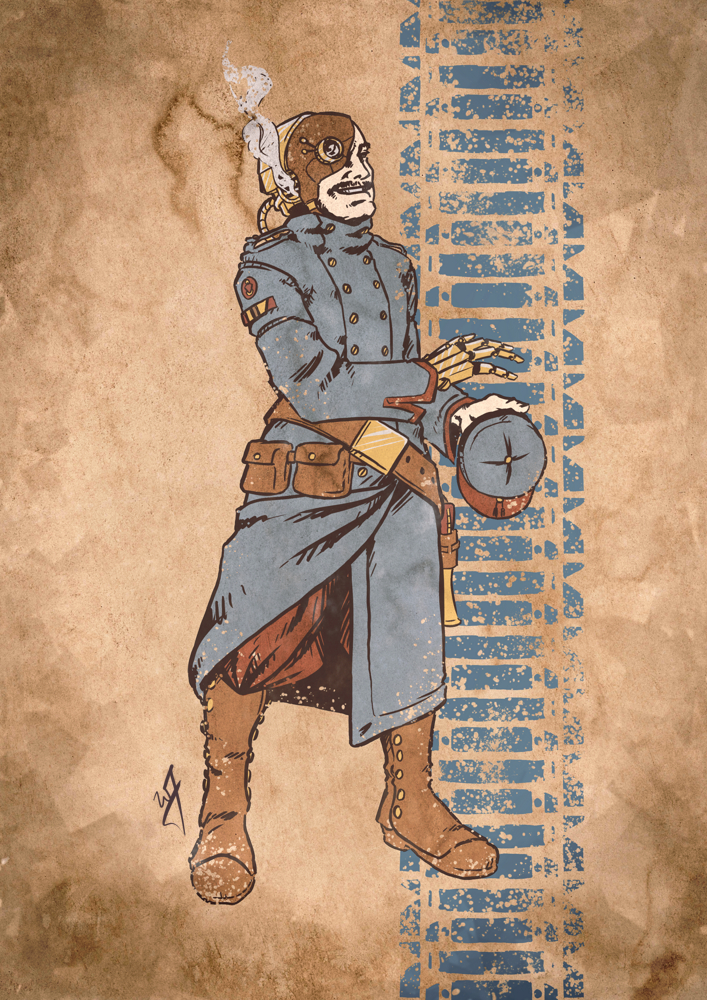
    I had the opportunity to vie for the position as an illustrator for an upcoming Kickstarter campaign (unfortunately I can’t share more details, because I am under a non-disclosure). I didn’t get the job unfortunately, but I would like to share my experience so others who are looking to do this kind of work may have a bit of wisdom before diving in.


    no_blood_required_1_web

    Protecting Your Work

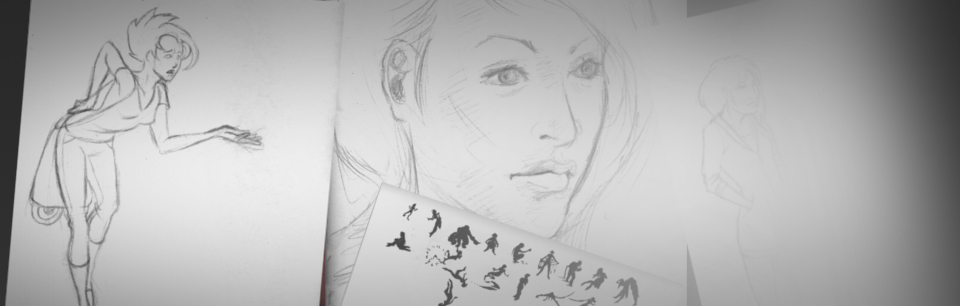
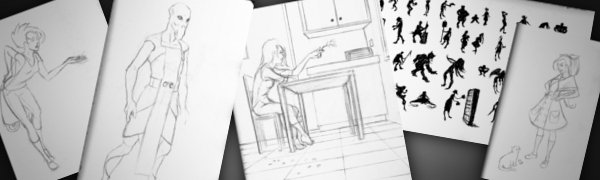
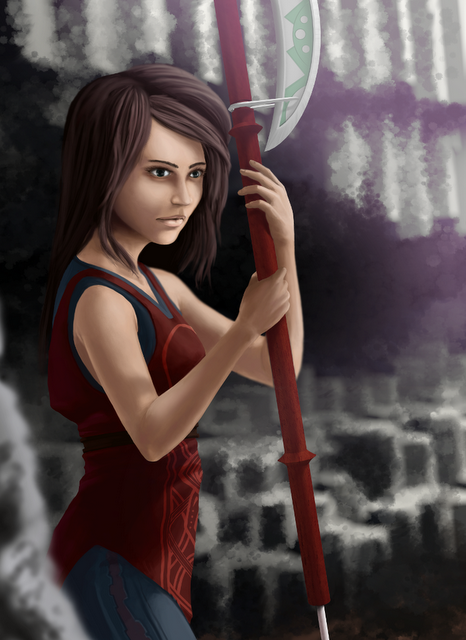
    The creator of the product, after showing me the specifics about the product, was very open with me about how he was shopping for artists to work on his project. He asked that I, along with others, would need to submit some examples of the art he was looking for.

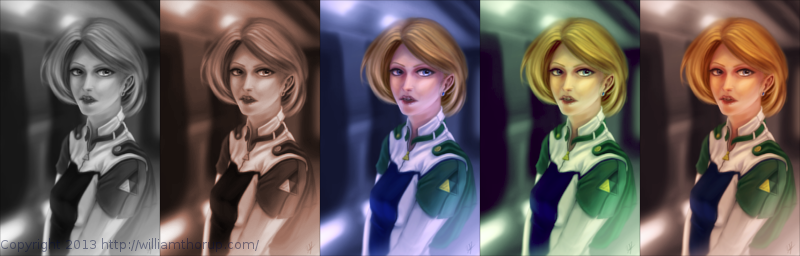
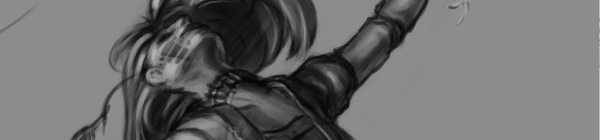
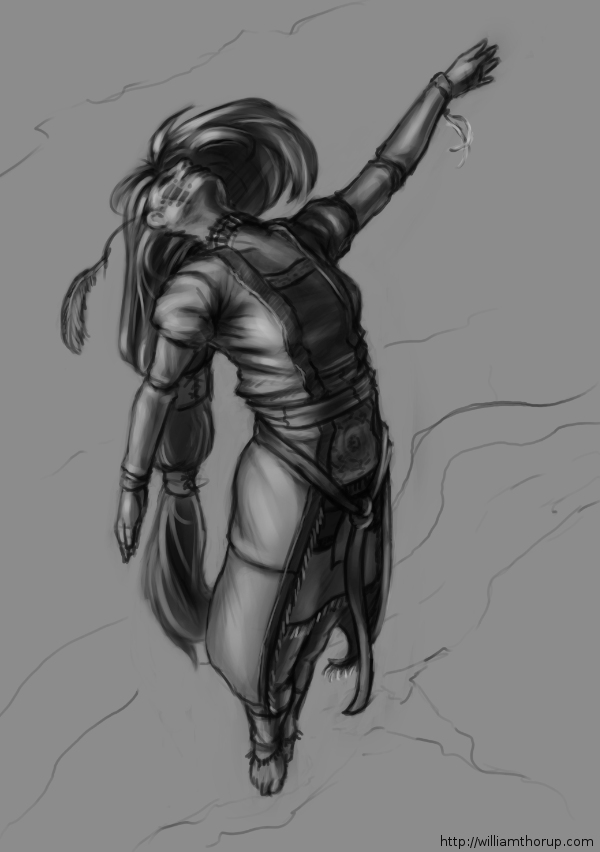
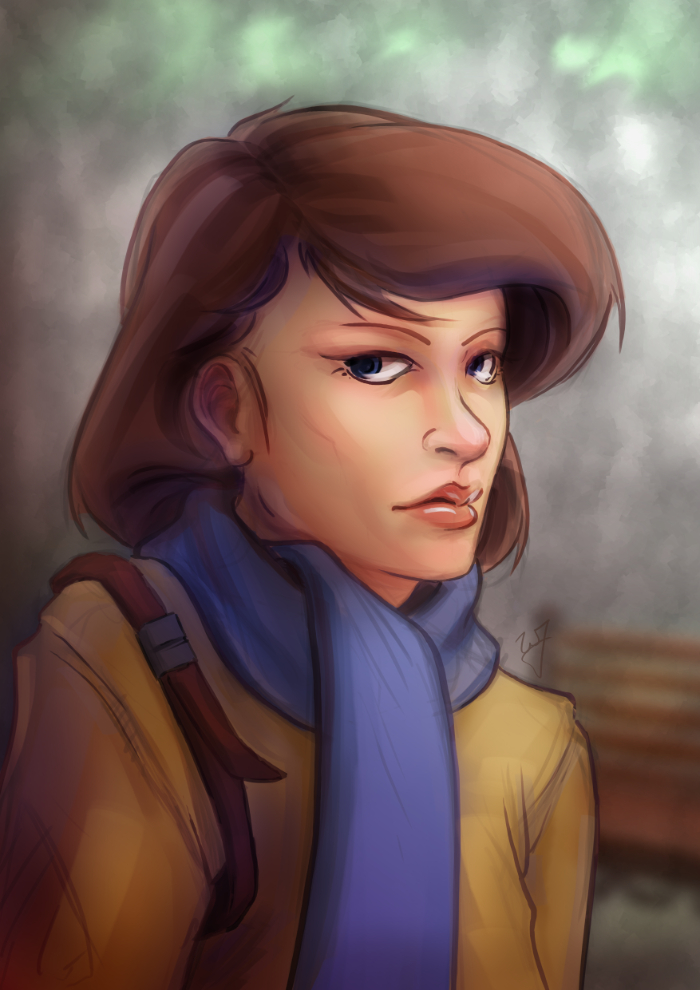
    Naturally, when the campaign creator stars seeing all of these different character concepts will begin to hone down on the look he is going for. This is a great thing to do as a producer, but it does raise a few concerns for the artist. What if I don’t get the job, but the campaign organizer obviously uses your ideas, but with another artist, or, blatantly copies your works. What should you do to prevent and discourage this?

    “This will ensure that your work remains your own until you say otherwise.”

    First, rights to use your artwork can only be laid out with properly signed paperwork. Without paperwork they do not own anything about your artwork until you sign over the intellectual property of your artwork, or, you license the use of your artwork to them for a specific purpose. Communicate early on when working with a campaign organizer, that paperwork is required before they can use your artwork for anything, and preferably before you start moving forward with any art creation. This includes should include before prototypes of the product can be made with your work on it and marketing material that may include your artwork.

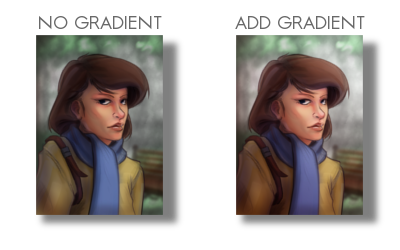
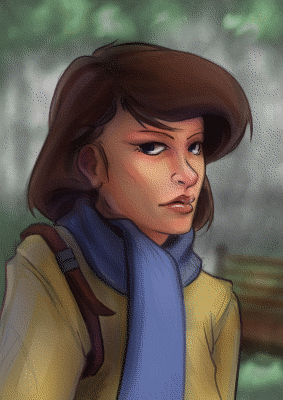
    What do you do to protect your work before paperwork. Add a watermark to your image that you send to them. It should include your name (or business name), the year, and a copyright symbol. And if there won’t be paper work for a while, I would add a message to the watermark that says “For Preview Purposes Only”. This will ensure that your work remains your own until you say otherwise, and discourage others from stealing your work. It sends a message that you are serious about your doing, that your work has value, and you are looking for an honest relationship.

    Working with other Artists on a Campaign

    It was pretty obvious that the campaign organizer I was working with had done very little planning for the Kickstarter campaign, or for a future business that may spawn from the Kickstarter. This isn’t necessarily a bad thing, and doesn’t mean they don’t know how. In fact, I am very thankful that this was the case, as it was an opportunity for both me and this individual to really explore what we wanted from the Kickstarter and beyond.

    With that in mind, here are a few questions to ask the Kickstarter Campaign owner/creator in order to better know where they might stand.

    • What is your campaign goal?
    • Who else will be gaining from the campaign funds directly? (partners, spouse advisory, close friends, etc…)
    • How will you be fulfilling campaign backer rewards?
    • After the campaign is funded and backer rewards are fulfilled, what are you planning on doing to do with your new product?

    There are more questions that can be asked, but these few will help you quickly determine how far along the planning is. Confusing answers or no answers to these questions could be a red flag for you, try to find someone you trust to talk about these answers with, to help determine how much of a risk your taking on if you do get the job.

    The Value of Art In Relation to Mechanics

    In the book illustration world, the artist along with the writer almost always receive a percentage of sales from the publisher. The percentage varies, and in this story the exact percentage doesn’t matter much. What matters is that the business world, publishers, artists, and writers alike all understand that art holds an importance in selling a product, both in marketing and in the user experience of the product. I included this concept in what I expected to receive monetarily for my work.

    “You work is not just a pretty picture, but can and should work with and improve the overall user experience.”

    At this point, I had already submitted my sample artwork, and they loved it. After this great feedback, they requested my costs. I sent them a base production cost along with an expected royalty based off of net sales of the Kickstarter product, out side of the Kickstarter campaign (future sales through distribution channels other than Kickstarter). The response I received was disappointing.

    The point of contention was the royalty. At first, the reasoning for them not wanting to give a royalty was because they considered me an non-established artist, and that asking for a royalty was inappropriate on my part. For anyone who might be wondering if valid train of though, it usually isn’t. They continued to try and talk me out of it, with the partially valid idea that I don’t bring much value to the Kickstarter, because I don’t have a large social media following. In the end I learned that this is what they were really looking for in the end, someone with an online following.

    This part of the story taught me three things. First, by sticking to my guns about the royalty, I was able to draw out what the campaign organizer was looking for, someone with an online following. This was definitely a part of the bill I couldn’t fill, and it was clear to both of us that I wouldn’t work out for his plans.

    A Kickstarter includes backer rewards that will include your artwork on other giveaways other than the product itself. This could be signed prints, your signature on on the product, unique artwork for specific backers, etc. Just remember if your artwork is going to be prominent on the product, it will probably be prominent elsewhere, and there isn’t any reason why you shouldn’t get a kickback for that.

    The third thing I learned, after counseling with other business professionals, research, and just my gut feeling, is that the value of my work can, and probably should, extend beyond just the cost of production. You work is not just a pretty picture, but can and should work with and improve the overall user experience. Not to mention it’s use in marketing materials to help sell the product. Anyone who doesn’t understand this on some level, is someone I don’t want to work with.

    tanks_and_steam_1_web

    Pricing Yourself

    What you should charge your client is always a difficult question to answer. Keep in mind I am talking about the base production cost to produce the art, or the time it takes to actually draw your pictures. When pricing yourself out, here are a few tips.

    “Getting a good sense of this information allows you to ask informative questions, and formulate an informative decision…”

    Research was a great starting point. Now you won’t find much about making artwork for a Kickstarter, but, there is standard pricing for illustration work. Everything from book covers, to card games, to children’s books. Getting a good sense of this information allows you to ask informative questions, and formulate an informative decision on how much your worth. My biggest help when finding an answer to this was getting on forums, and talking with people you who might have expectations for pricing out art, and other artists. Don’t be afraid to shoot a message to other artists that have been pricing themselves out for years.

    As for technically how I came up with a number. Doing the sample pieces actually helped out allot. Because I had done the few example pieces, I learned what the campaign organizer was looking for in a final piece, and how long it took me to create it. At this point it was a matter of counting how many paintings I needed to do for the project, multiplying that by my hourly rate, and then adding a bit on top to account for revisions, and variable research time. Don’t forget your research time.

    If the client doesn’t like your honestly calculated numbers, you have a few options. Standing your ground is what I would suggest. It tells yourself and the client that your work has value, and that you want to establish an honest relationship. This is a situation good for everyone.

    The other option is to lower your price. If you lower your prices, after calculating a number that is truly fair according to what you know, and you get the job, you will now be working with the knowlege that you aren’t being paid what you are worth. This will effect your work, most likely negatively. Your establishing, consciously or sub-consciously for both you and the client, that you aren’t actually worth the money that you think you are worth. This situation is not good for anyone or the project itself.

    Client’s will sometimes come back with comments like,”Well, this other artist is only asking for half of what you want.” If you believe that you are giving what the client wants, then this isn’t a competition with other artists, and they are saying this to drive your price down. Also, at this point things become very subjective, if they can afford every artist that has submitted artwork, they will end up picking the artist they like best. Comments like this also usually mean they like your artwork, but they don’t like the price. If they like your work, they should like your price, unless they simply don’t have the budget to afford you. In that case they should find someone else, or scale back the amount of work they need done if possible, in order to afford your work.

    no_blood_required_4

    If You Don’t Get the Job, What Do You Do?

    Ah… The best part. Dealing with rejection. My best piece of advice is to explore the experience. That is the primary reason why I am writing this article. It is an opportunity to reflect on what you learned, what future expectations should be, share what you learned with others, and a take a chance to enjoy the process.

    The work you might have done for free doesn’t have to go to waste. Include it in a portfolio targeted at similar Kickstarter projects, and go find more work. With your new found experience the next fish should be easier to catch.

    Conclusion

    Overall the experience was great for me, and I believe it was good for the campaign organizer as well. It helped me better appreciate the value of my work, how to communicate that value to others, and what to look out for when it comes to forming partnerships for specific type of project. I hope that this helps someone out, let me know if you have any questions or comments.

  • Atari ST | SatanDisk Partition Loss Fix/Modification

    Atari ST | SatanDisk Partition Loss Fix/Modification

    So I have had my SatanDisk for about a year now, and it has been an absolute joy to use. Transfering files to and from my Atari ST to a modern computer is a snap. It allows me to work on my pixel art easily (I need to post some of this some day…), and allows me to back up my programming work easily as well. If you are still and avid Atari ST owner, I highly suggest at least getting this. There are some better options out there now (like UltraSaTan and CosmosEX), but this one is so simple to use, and relatively cheap to get.

    With all that it has going for it though, there is one thorn I haven’t been able to pull out since the day I bought it. Seemingly random partition table loss on the SD card, making data hard to restore without using a hex editor. Sometimes the partition table becomes corrupted when I power everything down, or forget to power off the SatanDisk before pulling the SD card. All I know for sure is that it is happening, and I am not the only one who has had an issue with it.

    When I set out to see if others were having a similar issue as I was, information was sparse. Most people were complaining about a flaky DMA chip (way over my head kind of stuff), but all these users were dealing with STe and Mega ST’s, I am still using my lowly 520ST. Then when poking around Jookie’s site (the creator of the SatanDisk, there was a listing in the Download section about someone else having the same problem as me, and on the 520ST.

    After examining the two pictures included in the fixes ZIP file, I soon realized that the SatanDisk I had bought from this seller on Ebay (seller: darekp324 ) was using a different PCB layout than the original schematics. This is the main reason why I am doing this post, to help those who may have bought the same model of SatanDisk I did. This mod keeps the SatanDisk from ruining the partition table on the SD Card. Lets get started.


    Tools and Supplies

    You will need your trusty soldering iron and some solder. A pare of wire snips, and a 10K ohm resistor (colors: brown, black, orange, gold). A small flat head screw driver and a hammer.

    resistor_10kohm

    10K ohm Resistor

    Opening the Case

    The maker of this particular SatanDisk decided that a permanently sealed 3D printed case was the solution to encasing this wonderful device unfortunately. And if you are worried about damaging it a little bit, then this isn’t the tutorial for you. We will need to take the top and bottom layers of the case off.

    Put the case on it’s side and using the the flat head screw driver, find a point to split the case open about 1/2 cm from the top of the case. A couple taps of the hammer on the screw driver should begin to drive the layers apart. Now just work your way around the edges, separating the top from the rest of the case. Do this for the bottom of the case as well.

    Soldering Points

    This is where you will save a bit of time, about 10 minutes, because I was able to determine where to attach the resistor after following a few traces. Here is a picture. Solder at the points marked. Point 1 is a through-hole, and you will be soldering on the back, while point 2 is on the top surface of the PCB and will require very little solder to attach your resistor to it.

    satandisk_diagram

    Click to Enlarge

    After soldering your resistor, you will be done. I just used some tape to put the case back together, or move it to a different case, and you are good to go.


    Fairly easy, and I hope it saved you a bit of time. I have tested it somewhat thoroughly. Pulling out the SD card while everything is powered on, power cycling the SatanDisk, etc… and the partition table lived through it all. Please let me know if it didn’t work for you, so I can reassess where the resistor needs to be soldered. Time to go play some Rodland.

  • Atari Jaguar | Nondestructive 50/60hz Switch Mod

    Atari Jaguar | Nondestructive 50/60hz Switch Mod

    Here is a little mod for the Atari Jaguar that I don’t think is available on the internet at the moment. I was looking to add a switch to one of my Jaguar consoles in order to switch between PAL (50hz) and NTSC (60hz). In order to test Flappy McFur in both modes. The tutorials available online all use an additional switch in order for the mod to work. Also, most of the available tutorials suggest cutting a hole in the beautiful Jaguar Console’s case. In the case of this one tutorial, you can even use a rocker switch, which looks pretty cool I must admit, but I am not comfortable with cutting a hole into my cat.

    So, during a conversation with an electrician friend, who has helped me with some other Jag related electronic issues, he pointed out that you just need to short out the point that is used to detect whether or not the console is in PAL or NTSC mode. Obvious right, this is what an external switch does. Then he proceeded to point out that the console already has an “additional” switch that could be used for that purpose, without damaging the console. That is the switch located on the RF module.

    A couple of minutes later, we had a Jaguar switching refresh rates like a pro.

    Disclaimer

    Now, the title of this post isn’t completely telling the truth. You do have to sacrifice one of the RF frequencies (high or low, I can’t remember which one…), but this is a small price to pay, and for most Jaguar owners, not a big deal. Composite or S-Video right? If you still really want to use RF, the option is available, but slightly limited. And before we start, I don’t take responsibility for anything that might happen to your console during or after you apply this modification. With that in mind, I have had this mod for about 2 months now, with no issues on my NTSC jaguar. Lets get started.


    50/60hz (PAL/NTSC) Switch Mod

    Tools and Supplies

    Tools and supplies are simple. Just a soldering iron, some solder, a wire (about 15 to 16 inches long – 38cm to 41cm), and a Jaguar console.

    Opening your Console

    Here is a quick video that will show you how to do that. Basically for screws and bending up a few tabs.

    Soldering

    First you will need to open your console, if you aren’t sure how to do this here is great video to show you how to do that. After you get access to the motherboard, you will need to remove the metal cap off of the RF modulator (the silver box near the back left of the console. This is easy enough to pop off using a screw driver or pliers. This will give you access to soldering point 1.

    Point 1 is located in the top right corner of the RF modulator box, second from the right side of the box (please refer to the picture for reference). If you aren’t worried about being perfect, you can just add some existing solder to point, attaching it to the existing pin. Or, you can remove the older solder, and then re-soelder the point with the wire attached as well.

    50_60_point_1

    Soldering point 2 is a bit trickier, and requires a steady hand, and just the smallest amount of solder. The point is located on chip U25, and is the pin located at the bottom right (please refer to the image below for reference). What I did was apply a bit of solder to the tip of my soldering iron, and then, while holding the wire to the pin, dabbed the point until the wire sticks to the pin of the chip. Try to avoid getting solder on any of the other surrounding pins, it might cause the Jaguar to produce more intoxicating fumes than it usually does.

    50_60_point_2

    Tidying up

    As you can see in the picture below, I brought the wired around the left edge of the console in order to avoid any potiention electrical problems in the future. And I used tape to hold it in place. On the left side of the RF module box, there is an opening big enough to allow the wire to pass through to the inside of the back when you place the metal cap back on.

    50_60_mod_wide


    I hope others find this modification useful. It is entirely reversible by desoldering the wire, no problem. Also, no worries about cutting a nasty hole in the side of your gorgeous console shell. If you run into problems with this mod, or think that this isn’t a good idea, please let me know. Here is a video showing the mod in action.

  • Quick Tip | Drawing a Character in Profile | Video Tutorial

    Quick Tip | Drawing a Character in Profile | Video Tutorial


    Here is something that I put together a few weeks ago, and just got around to finishing it. This small tutorial covers a couple different methods of creating an accurate representation of a character’s profile, based on a previously draw front view of that character. Enjoy.

  • Krita & Gimp Illustration | Zelda

    Krita & Gimp Illustration | Zelda

    zelda final_web

    I don’t do allot of fan art, in fact, this piece originally didn’t start out as fan art. I was watching an episode of from the first season of Robotech, and sketching at the same time on my Lenovo tablet, when I did the initial sketch. (The costume is somewhat Robotech inspired). The one you see at the beginning of the time lapse video. It wasn’t until after I started refining the sketch in Krita, did I decide to turn it into fan art.

    Don’t get me wrong, I think fan art is awesome, and an awesome way to express you appreciation for something (Isn’t that what art is kind of about?). And I wish I would take more time to do some fan art. But I tend to avoid it, because I have the feeling that I won’t be able to do it justice. So, I put off most of the fan art I would like to do for a later day and time.

    This time around, though, I feel I did a fairly good job, and feel comfortable in posting and receive feedback for this piece of fan art.

    But enough of that, lets go over some stuff that I think is worth talking about, and might be a bit educational. I am just going to start at the beginning of the video and mention a few interesting things I noticed in my process.


    First, a bit of an explanation on content and style. This is a re-imagining of the character Princess Zelda, from the Legend of Zelda video game series. When I decided that this was going to be a fan art piece, I wanted to stick to the poofy hair and a somewhat military uniform as seen with many of the characters in the first season of Robotech, but with a bit of Zelda seasoning. There are actually only a handful of things that tie this piece into the Zelda universe.

    The most obvious things are probably the colors. The blue rupee, green hood and shoulders, and the golden triforce all point to the Legend of Zelda. But there is also the character herself. Zelda is often portrayed as someone beautiful, with a sense of innocence, which is something I stuck to here. But the costume was chosen to depict the strong side of her character as well. A less obvious sign of her character is that her mouth is open, as if she were speaking to you. Zelda is often used in the Zelda series as a mentor character, and if she lived in a more futuristic or sci-fi world, I see her playing more of the mentor character than royalty.

    There are a few other things I could mention, content wise, but for the sake of keeping things short, I will let you jump on the Zelda Wiki to figure some of the other imagery out.


    zelda_palette_1.png

    As for my processes. Most of my planning was done in the line art. At this point I didn’t have a really good sense of the lighting, until I sat back and thought about it later, but I had a good idea of what I wanted the subject to look like.

    I decided to skip doing a value painting, and go straight into color and value. I try to avoid this nowadays, and stick to a value painting before I ever jump into color, but in this case, I wanted to try something new.

    I wanted to try to create a simple color palette to lay the foundation for my colors and values. I don’t include this step in the video, but it is something that I learned from a post by Nasan Hardcastle. A great digital artist, that I suggest that you all follow. But having a simple palette like this can help keep your colors and values organized in the foundation of the painting.

    Something unique in this painting, that I have never done before, is the light setup. If you include ambient light, I have a total of 4 different light sources in this painting. This was one of my stretch goals for this painting, to use that many light sources without loosing the form of the subject, and adding appeal to the painting overall.

    But not all was fine with this painting. I messed up on the proportion of the nose, and had to readjust that half way through. Not too difficult, but I feel it’s something that I shouldn’t have to deal with and definitely need to practice more on. Also, another proportion problem was the width of the head, which I eventually had to fix.


    But with the good and bad of this painting aside, there is one tip I would like to share. Color Grading. One of the huge advantages to digital art.

    Zelda_Color correction

    I have never been good with color, this is probably because I don’t have a solid base in traditional painting. But, “color curves” an “levels” make up with this shortcoming with ease. Using some reference images that I wanted to match color with, I did several stages of color correction, as depicted above, using both “color curves” and “levels“, and selection the specific color channel I wanted to modify.

    Zelda_Color moods

    These two options can also be used to quickly change the feel of a painting. A good way to explain this is how a sepia toned image and a black and white image create very different feelings, even though content may be the same. This is pretty basic stuff, especially if your into photography, but it is fun to take an image you created from scratch and see how it transfers to these different color schemes.


    I have a few more paintings coming down the line, we should be starting a new app project soon, and a Weekly Sketch Review is just around the corner. Stay tuned.

  • Draw Night | Value Painting Tips

    Draw Night | Value Painting Tips

    ascension_Value Sketch_web

    We had a good draw night yesterday evening. Good to see friends and draw a few things as well.

    During the few hours I was there, I worked on a sketch that I had started the day before, that I enjoyed, and I thought I would push it into a value painting. And, as I was recording my desktop, I thought that it would be good to not only have the time lapse, but also include a few tips and things that go through my mind while I paint. For my benefit and for yours.

    The video is fairly short and to the point, and I hope it helps. And if it doesn’t help, I also recorded myself through the webcam. So, at least you can laugh at me, as I get ridiculously close the screen and perform all sorts of weird expressions.

    If you are interested in joining us for draw night and live in the greater Salt Lake City Utah area, drop by our Facebook page and let us know. The location sometimes changes, so keeping tabs on the Facebook page will keep you up to date on the location.


  • Tutorial | Using Gradients

    Tutorial | Using Gradients

    In the Park

    I have been using allot of gradients in my work lately. Because of this, I thought it might be good to put together a tutorial of how I have used them so far.

    As for what I want to come across to the reader, I want you to learn how to use gradients to create a focal point in your image, diversify and images color, and create a sense of depth.

    Also, in order to help bring my points across, I have included a project file that can downloaded by clicking on the buttons below. I will be referring to this file throughout the tutorial.

    Download
    XCF_Download_ButtonPSD_Download_Button
    [expand title=”Download Notes”]

    Note: The Photoshop file should work to the best of my knowledge. The only thing that might not work are specific layer’s blending modes. Here is a list of the layers and the blending modes they should be on:

      • “Gradient Painted” –> Multiply
      • “Gradient Tool” –> Overlay
      • “Subject” –> Normal
      • “Background” –> Normal

    Another option is to download a copy of Gimp, HERE. IF you are using Windows or a Mac, about halfway down is a link that says “Show other Downloads”, click this and you will find versions for those platforms. It’s free, and small, and you will be able to open up the project file without a problem.


    [/expand]

    A bit of disclaimer. I consider myself in the professional work field, but I am not a master at the craft. This tutorial is to share knowledge and a few tips to other artists who may not know what I am about to teach.

    Also, if you don’t know how to use the gradient tool, or blending modes for layers, in your given program, go ahead and do a Google search about these two things. Having a basic knowledge of these two tools is essential for this tutorial.


    I feel Like I’m Cheating

    When I first started doing digital artwork, for some reason I had it in my head that using gradients was kind of shortcut, and it was something that professional artists tend to avoid. Gradients, along with some other tools (dodge and burn tools) almost seemed taboo, and were used by beginners to add shading in a cheap and quick way. I can’t remember were I got these ideas, but I couldn’t have been more wrong.

    The years rolled by, since I started in digital art, and I began watching tutorials, seeing time lapse videos of paintings, and talking with other digital artists. And I began to realize that these tools were not a way to cheat, but instead to speed things up. These artists are professionals, on a deadline, and in order to get a large body of work done quickly and effectively, they would need these tools to speed up their work. This is one of the advantages of digital art, within a production environment.

    I learned that these tools, if used properly, can be used to enhance and speed up your overall workflow, without having to sacrifice quality.


    Adding Depth

    Here is a recent example of a gradient used to create depth in my work. You can see the original post for this piece HERE, along with a time lapse video.

    example_1

    By creating a gradient, that matches the angle of my light source, I turned this somewhat “flat” looking piece, into something that gives you a sense of depth. Yes, I could have taken the time to go and paint that subtle change from light to dark manually on my character, and then the background. But, because this is a concept piece, the less time spent on it the better. I turned a potential 3 hour long piece, down to 1 and half hours. More time to do other work, with out sacrificing quality, is good in my book.

    Also, you might have noticed, the gradient doesn’t go from a black to a white. There are cases when you will use just a black to white gradient, but I found by adding color to the black or white can introduce new colors to the piece.

    Ted_concept_1_webcooper_websarah_web

    By the way, I used this same technique in all three of these paintings. But notice how I used a different color for the gradient to match the colors of costume for the character on the left. Also, notice how subtle the change is. Often you don’t need to have your overlayed gradient at full opacity. I usually end up dropping the opacity of my gradient layer down to around %50.

    Try this out. In the project file make sure you have the “Gradient Tool” layer selected, and try adjusting the brightness and contrast. See how this changes the sense of depth in the image.


    Color Diversity

    Adding color to the gradient, while using the “Overlay” blend mode, can add additional colors to your painting. If you examine the project file you downloaded, I did this in that painting. Go ahead and turn the “Gradient Tool”  layer off. A huge change will occur. Not only do we lose the depth, and the focal point in the painting, but the colors don’t seem to work as well.

    example_2

    I am using a tertiary color scheme with this piece. Brown, yellow, and blue, to put it simply. So by changing the black of my gradient to a brown, similar to the subjects hair, I am able to introduce those brown colors to other parts of the painting.

    Especial her right shoulder. Originally, it’s a flat yellow color, nothing that interesting to look at. But, by adding that brown gradient and using the blend mode “Overlay“, it adds body and life to those yellows on the jacket, and ties it to the focal point.

    Try this little experiment in the project file. Select the “Gradient Tool” layer, adjust the hue, along with the saturation, and the brightness and contrast. See how this changes the mood, and overall liveliness of the image.


    In the Park_focal point gif

    Creating a Focal Point

    If you are doing any type of illustration, or a piece with a central idea or subject, focal points are important. And this is where gradients can be very helpful to create a focal point very early in the painting.

    As you can see in the project file, the focal point is the face and the right edge next to it. There are several theories of composition I followed to achieve this, but the most important and the easiest to include at any point during a painting, is the change of values from light to dark, or contrast.

    If you turn off the two top most layers, “Gradient Painted” and “Gradient Tool”. The change from light to dark, or the value contrast, has become flat. Very uninteresting, largely because there isn’t a focal point. But, if you turn those two layers back on, you eye is immediately drawn to the face of the subject.


    Final Notes

    Few things I would like to mention. In the project file, the top layer “Gradient Painted”, isn’t a gradient made with the gradient tool. I just used a large soft brush to add some contrast to the left side of the painting. Sometimes, using the gradient tool will seem too consistent or perfect for your painting. So, depending on what style your going for, painting a large gradient by hand will give you a better effect.

    Also, experiment with blending modes and gradients. Experiment with taking away and adding contrast using this technique. You might stumble on a look or feel that you like, but weren’t expecting.

    With that being said, I hope you enjoyed this tutorial, and I hope it helped in some way. Any questions or comments are welcome.

    I have a timelapse of the painting used in this tutorial HERE. Also, here is a list of time lapse videos and paintings of this technique in action. Sometimes it is better to see a technique in action than trying to talk about it.

  • Blender | “Sample Keyframes” Tutorial

    Blender | “Sample Keyframes” Tutorial

    Josh the Whale is still moving along, and while we have been journeying down this path, we are picking up on a few things.

    One of these things is how to handle assets between Blender and Shiva 3D, our current game engine.  And one particular asset of interest is animation.

    When you import animation into Shiva 3D it automatically interpolates the IPO curves as linear.  This is a problem because you lose all of your ease-ins and ease-outs.  Making any animation you do feel very robotic.

    One way you can avoid this is by key framing the nice curves (bezier curves), in Blender, to every frame of your animation.  This would obviously be close to  impossible to do manually for every frame, but Blender has a very nice option for this.  It is an option called “Sample Key frames”  under the “Key” menu in the IPO curve editor.

    This short video will demonstrate my current method, using this option, to preserve beautiful motion, between Blender and Shiva 3D.


  • Now, What Do You Use To Sketch?

    Now, What Do You Use To Sketch?

    Its always good to think about how we do things. Giving a little self-assessment can help us grow faster than we were before, and help us do our work more effectively, especially on how to sketch. So I thought I would present you all with my sketching structure. What I use and how I sketch currently. I will cover both my digital and real mediums. And I will provide a short list of things to consider when buying art supplies, and how to prepare to sketch.

    I hope I can spur up some thought, on your end, that might help or encourage the way you do things.  And, sorry to disappoint, but this is not about how I sketch, or my process of sketching.  But what I will be talking about will get you started, and help you get settled in a way of sketching.

    This is certainly not one of my usual, shorter posts, so take it in small chunks, and absorb it the best you can.  I tried to be as to the point, as much as possible, without leaving out things that I think might help others in their sketching processes.

    When it comes to drawing a sketch, my habits and process are constantly changing. This is my nature, as I am trying to improve my methods and discover new tricks and tips. Also, what I use and how I sketch are often influenced by what I am currently studying.

    For example. If you are focusing on gesture drawing, you might not need much more than a 8″ x 10″ sketchbook and a pencil. The pencil doesn’t really need an eraser in this case. Since you are probably trying to capture a gesture in a few seconds or less, and being outside, drawing people, there is usually no time to erase.

    But in contrast. If you are doing charcoal/graphite portraits, you will most likely have both a small and large format sketchbook, blending stub, several different pencils or charcoal sticks, kneed eraser, etc…

    And there will be times where all you need is an Etch a Sketch.

    What I am getting at, is this post is just to show how I go about sketching, currently. And my methods change constantly. Gotta stay fresh.

    • When I was Your Age…

    When I started seriously drawing and sketching, about 13 or 14 years ago, all I had was print paper and a pencil. I really had no comprehension of what kind of tools were available to artists, and really just found what I could around the house. This habit has stuck with me.

    Having loose sheets for sketching is not always the best way. Simply because you might lose that sketch and it isn’t the most convenient outside. But I have found that paper protectors, a binder and a little bit of effort will keep you from losing your sketches. I have always liked the feeling of loose sheets, it makes the sketch feel like something that could be framed, if need be. It also makes storage easier. The other reason I prefer this method is because you don’t have rings or the binding of a book to hinder the movement of your hand or arm.  A problem that I am plagued with when using smaller sketchbooks.

    Some things to keep in mind when drawing on loose sheets.

    1. No commitment.  The sketch is loose, and you don’t have to risk ruining a sketchbook removing a sketch you don’t want.
    2. Make sure that the paper you are using is acid free.  Most print paper should be, but I have been surprised too many times not to give this warning.
    3. A clean surface to draw on.  I just bought a piece of sturdy particle board, which I happen to use to attach small water color projects to, as well.  Now I don’t have to worry about the tably I am drawing on, being dirty, I brought my own table!
    4. Stick to standard paper sizes, like 8.5″x11″.  Going any bigger can be difficult to store and protect.  They do make binders and paper protector sizes for bigger and smaller formats, but these will tend to be harder to find and a bit more expensive.

    • My Basics

    The picture, to the right, is my basic setup. For when I have some time set apart for sketching. This includes a 18″x24″ sketchpad, a red lead pencil and a few other tools.  I will talk more about my tools in a moment.

    The reason I use a larger sketchpad is to practice using my shoulder more than my wrist. I have found, when I use a smaller sketch books, it is harder to use your shoulder. Simply because there is less room to make the larger movements of the shoulder.

    I also use a 24″x36″ sketchpad for detailed portraits in charcoal and graphite.  This is something that most classes will require you to have.  And it does feel cool to be drawing that big anyways.  It is always a good investment, if your planning on taking smaller sketches and making them bigger, or you are drawing from life.

    As for brand or what kind of paper you want in a sketchbook. I don’t know too much about those things. Only that there are differences in pricing.  I usually pick a mid priced sketchbook, because it seems if you invest a little bit more you get a better product.

    A fine tooth paper has worked for just about everything that I have done. But it will take a far more experienced person to explain the differences and the uses of the different paper weights available. Anyone who is reading this, if you have references or advice on this matter, please let us know.

    A few things to keep in mind when you are buying a sketchbook/pad:

    1. Think of scale and detail. Obviously you will want your drawing to be a certain size. But also keep in mind, that the larger the paper the more detail you can include in your drawing. A smaller sketchbook only allows for so much detail.
    2. Pick your binding. There are hardcover, tape bound, and ring bound sketchbooks.
      1.  Hardcover is the most permanent, and will keep the pages from rubbing together. Protecting any graphite sketches you might have. But, depending on the size of the sketch book, it might be hard to get the pages to lay flat, if the binding is really tight or the book is too thick.
      2. Tape bound is similar to hardcover, but it often allows you to remove your sketches more easily.  Good for classes and if you need to present or store your sketches separately.
      3. Ring bound sketch books make the sketching experience more enjoyable.  Simply because the pages always lay flat, and your hand will never run into anything, on the top or side of the page, that is distracting.  But the pages do have some room to slide around.  If you have any unfixed graphite sketches, they will get smeared and basically ruined.
    3. Think about how you are going to store you sketchbooks after they are used.  If your going to throw away all your hard work, don’t worry about it, but larger sketchpads can be difficult to protect.  Buying a similar size portfolio case is a good option but not always the best.  I have found the plastic storage containers are better (And cheaper).  They are ridged and mostly waterproof.  Truly protecting your larger sketchbooks.

    Hereis a simple list of some sketchbooks and their differences.

    • Tools for the Job

    There are hundreds, if not thousands, of different tools an artist can buy. So the question you have to ask yourself. What do I want to do? If you are planning on sketching, a few different pencils and pens will usually do the job.  Refer to the picture to get a look at my arsenal.

    Not very complicated huh.  In most cases, it doesn’t need to be.  I always tell myself when I am at the store looking at art supplies, it isn’t the tool, but the person who is using the tool that makes the difference.  This goes for just about any medium in any situation.  Now, I know that this little piece of advice doesn’t necessarily go for larger more serious projects and the materials you will use for them.  But for sketching, no need to get too expensive.  Its just practice.

    A small note about the red pencil in the picture.  If you have taken a 2D animation course, or read about the process of making 2D animation, you will know that they use different color pencils for various things.  It basically breaks the animation process down into visual steps.  To me, starting my sketches in red, tella me that this is not a final drawing, and changes can be made.  It also helps me not to worry about mistakes.

    Normal lead is stark.  If you lay down a line on a white piece of paper, that line will scream at you until you add some more lines.  One of the ways I avoid that feeling is by using a red pencil for my initial sketches.  Less intimidating than normal graphite.

    Another important tool for maintaining your artwork is a fixative.  This comes in an aerosol can, and is usually for charcoal, graphite, color pencil and pastel work.  You can also use hairspray to do the same thing.  But there are some things to take into consideration before you use hairspray.  Here will explain.

    • Digital Sketching | The future?

    Real mediums will never go our of style.  But if you have a little more money to spend, I highly suggest what I will talk about next.

    Portable devices are getting better, fast.  There have already been a few Windows slates that do very well at sketching.  But the one draw back that keeps most people from pursuing this kind of sketch book is the price tag.  Most, if not all of these tablets, are over $1000.  Placing these tablets a little too far out of an artist’s modest budget.

    Even the iPad is still above the mark that many artists are willing to pay, mainly because of the cost of extra accessories to get it to a point where you can use it to sketch on.

    But recently, through the mercy of Android.  The clouds have parted and the price has dropped.  And, currently, there is one 10.1″ tablet that is ideal for sketching.  The Lenovo Thinkpad 10.1″ tablet.

    I won’t get into a whole lot of details on this tablet.  But it does have pressure sensitivity, and with the Android Ice Cream Sandwich update, its pretty darn responsive as well.   And for a price tag under $300, it is hard to find anything out there comparable.  I’ll post more about this, and other future tablets, another time.

    With this tablet I have pretty much replaced my smaller sketch books.  For sketching and even for starting out a larger project it does very well for me.  I have examples here.  I don’t have a hard copy of my sketches, and sometimes battery life is a problem, but if you keep a good backup of your digital stuff, and keep the system off when you really don’t need it, these problems are nullified.

    One more thing that puts this on the top for me.  I am usually carrying this tablet around for work.  So whenever I have a little bit of free time, I have no excuse but to draw. I also use it to do preliminary sketches when I am sitting and discussing things with clients.

    Then there is sketching with a tablet digitizer.  I currently have a Wacom Intuos 4 8″x5″.  And I usually use this for sketches that I will be taking to a final product.  But there are times that I do sit down and sketch with it.  Something that I should probably do more often, since it is my primary medium right now.

    These can be pricey, depending on what brand you buy.  Wacom is top dog when it comes to these types of devices, but there are a few other companies the produce comparable tablets for less.  If you are doing any type of digital painting, a drawing tablet is a must.  And if you start getting really serious about it,  you will most likely end up with a Wacom Tablet.

    Here is an example of one of my sketches on this drawing tablet.

    And for anyone who is interested in what software I use.  Adobe Photoshop, Adobe Illustrator, Inkscape, The Gimp, Mypaint, Alchemy, Krita and Blender.    Any one of these programs can be used for sketching, to one extent or another.  I tend to lean towards all of the open source packages, because it makes me feel better inside, helping out those communities.  But the Adobe products have many things that open source is catching up to.  If you going to be sketching digitally  though, there is no reason to drop a few hundred dollars into a professional package.  Its just practice, right?

    • Conclusion

    Sketching is such an organic process.  Both how and what you sketch with can, and probably should, change constantly.  If you are an aspiring artist, strive to be a sketch artist.  This will often be the basis of everything you produce.  And I hope that something in this article could help you something.  I know that just by writing this, I learned a few things about myself.  To teach is to learn.

    If you have any questions and comments, feel free to leave them.  I am not the most authoritative voice out there, but I will do the best I can to respond.

  • Another Portrait

    Another Portrait

    Here is a piece, 2 months in the making.  Obviously it didn’t take that long to actually paint this one, I just didn’t continuously work on it during these last 2 months.  And of course, things like work, friends, family, etc.  kept me from finishing this one quicker.
    Sorry that I didn’t record this one.  It was actually a piece that I started at our draw night group here,  and I didn’t start out recording, so i decided not to record the rest of the process.

    I think that the total time on this one was about 6 hours.  And the programs I used were the Gimp and Blender (for the weapon and background).

    (click image for larger preview)

    Some of the things I focused on in this piece were the detail in the face, some new shading techniques and the use of 3D to create objects in the scene.  Using a animated speckled brush in the Gimp allowed me to create smother transitions in skin tones, and at the same time, add texture to the skin.
    Then for the background I wanted to create these basalt formations that our found in places like Iceland.  So using Blender, I quickly made a long hexagonal object, and basically duplicated it until I got the form of the background I wanted, and adjusted the lighting to match the lighting on the character.
    The rendered image, out of Blender, doesn’t look much like what is in the final piece.  The reason for this is, that I wanted to draw the viewers eye to the character.  So by blurring and adding much more texture to the background I was able to create a depth of field effect in the painting that brings the focus to the character.  As you would do in photography.
    I also used Blender to create a basic ax shape for the character to hold, and then painted the details on the ax in the Gimp.  Also adjusting the lighting on the weapon in gimp as well.

    This was a great piece to work on.  Any comments or critiques are welcome.